Apple slab pie brings all the comfort of a classic apple pie, just in a shape that actually feeds a crowd without turning dessert into a wrestling match over slices. The crust stays flaky, the filling bakes up jammy and spoonable, and every piece gets a little bit of that crisp edge from the sheet pan. It is the kind of dessert that disappears fast at potlucks, holidays, and any dinner where you need something that feels generous.
The trick is treating the filling like pie filling, not apple salad. Cornstarch thickens the juices as the apples bake, while lemon juice keeps the flavor bright and stops the sweetness from going flat. Pressing the bottom crust firmly into the pan and cutting good steam vents on top keeps the bottom from turning soggy and helps the filling bubble instead of bursting the crust apart.
Below, you’ll find the timing cues that matter most, the apple swap that changes the texture the least, and a few ways to make this fit your own kitchen without losing the bakery-style finish.
The filling set up beautifully and didn’t run all over the pan. I loved how the top crust stayed crisp even after the glaze went on, and my neighbors asked for the recipe as soon as I brought it over.
Save this apple slab pie for the next time you need a crowd-sized dessert with flaky crust, spiced apples, and a simple glaze finish.
The Mistake That Makes Slab Pie Go Soggy Before It Ever Slices
Slab pie has one weak spot: all that fruit juice wants to soak straight into the bottom crust before the filling has time to thicken. That is why the base needs to be cold, firmly pressed into the pan, and pricked just enough to let trapped air escape. If the dough is loose or warm, it puffs and buckles, and the juices collect in the lowest spots instead of baking into a neat filling.
The other thing people miss is that the filling needs a visible bubble at the edges before you pull it from the oven. That bubbling tells you the cornstarch has actually activated. If the pie looks pale and calm in the center, it is usually underbaked, and the filling will run when you cut into it.
What Each Ingredient Is Actually Doing in This Pie

- Refrigerated pie crusts — These keep the recipe practical without giving up that tender, flaky bite. Homemade works if you already have a favorite dough, but the store-bought version is the better choice when you want a dependable crust that fits the pan with less fuss. Let the sheets warm just enough to stop cracking, then press the seams together firmly so the bottom bakes as one layer.
- Apples — Use a mix that holds its shape and softens cleanly, like Granny Smith, Honeycrisp, or Braeburn. Very soft apples turn mushy before the crust is done. Slice them thin and evenly so the filling bakes at the same pace and does not leave you with crunchy pockets.
- Cornstarch — This is what turns loose apple juices into a sliceable filling. Flour can work in a pinch, but it gives a duller, heavier texture and needs more time to thicken. Cornstarch gives you that glossy, clean set once the pie cools.
- Brown sugar and granulated sugar — The mix gives the filling both depth and brightness. Brown sugar brings a little molasses warmth, while white sugar keeps the apple flavor clear instead of muddy. If you reduce the sugar, the pie still works, but the filling will taste sharper and less dessert-like.
- Lemon juice — This keeps the apples from tasting flat and balances the sweetness. Fresh is best, but bottled works here because the amount is small and the fruit is doing most of the work.
- Egg wash and cinnamon sugar — The egg wash is what gives the top crust its shine and helps the cinnamon sugar stick. Skip it and the crust will bake up matte and a little dry-looking, even if the flavor is still good.
How to Build the Filling and Bake the Crust Without Losing the Crunch
Pressing the Bottom Layer
Lay two pie crusts side by side and press the seam firmly so you end up with one even sheet for the pan. Gently work it into the lightly greased rimmed baking sheet, then prick the bottom with a fork to keep big air pockets from forming. If the dough tears, patch it with a scrap and press it smooth; small flaws disappear in the bake, but gaps let juices leak under the crust.
Mixing the Apples
Toss the sliced apples with both sugars, the spices, cornstarch, and lemon juice until every piece looks lightly coated. The cornstarch should cling to the fruit, not sit in dry streaks at the bottom of the bowl. If you see clumps, keep tossing for another few seconds, because clumps of starch turn into gummy spots in the finished filling.
Assembling and Venting
Spread the filling in an even layer and dot the top with the diced butter so the filling bakes glossy and rich. Add the top crust, press the edges to seal, then crimp well so the filling stays inside the pie instead of bubbling out onto the pan. Cut enough steam vents for visible movement in the oven; if you cut too few, the top crust can balloon and split before the apples soften.
Baking Until the Center Bubbles
Bake at 400°F until the crust is deeply golden and the filling is actively bubbling through the vents, usually 40 to 45 minutes. The color matters, but the bubble matters more. If the top browns too quickly before the filling is bubbling, lay a sheet of foil loosely over the pie for the last stretch so the crust can finish without burning.
Make It Less Sweet Without Losing the Pie Feeling
Cut the granulated sugar back by a few tablespoons and keep the brown sugar in place for depth. The pie will taste a little brighter and more apple-forward, but the filling may look looser when it comes out of the oven, so let it cool completely before slicing.
Gluten-Free Version That Still Slices Cleanly
Use a gluten-free pie crust that bakes well on its own and check that your cornstarch is certified gluten-free if needed. The texture will be a little more delicate at the edges, so cool the slab pie fully before lifting out the first pieces.
Dairy-Free and Still Rich
Swap the butter in the filling for a firm plant-based butter and use milk in the glaze if that’s what you have on hand. The flavor stays close to the original, but the glaze may set a little thinner, so keep it light and drizzle after the pie has cooled.
Storage and Reheating
- Refrigerator: Store covered for up to 4 days. The crust softens a bit over time, but the filling stays set.
- Freezer: Freeze baked slices tightly wrapped for up to 2 months. Thaw in the refrigerator so the crust doesn’t turn soggy from rapid condensation.
- Reheating: Warm slices in a 325°F oven until the crust crisps back up, about 10 to 15 minutes. The microwave will make the pastry limp, which is the fastest way to lose what makes this pie worth baking.
Answers to the Questions Worth Asking
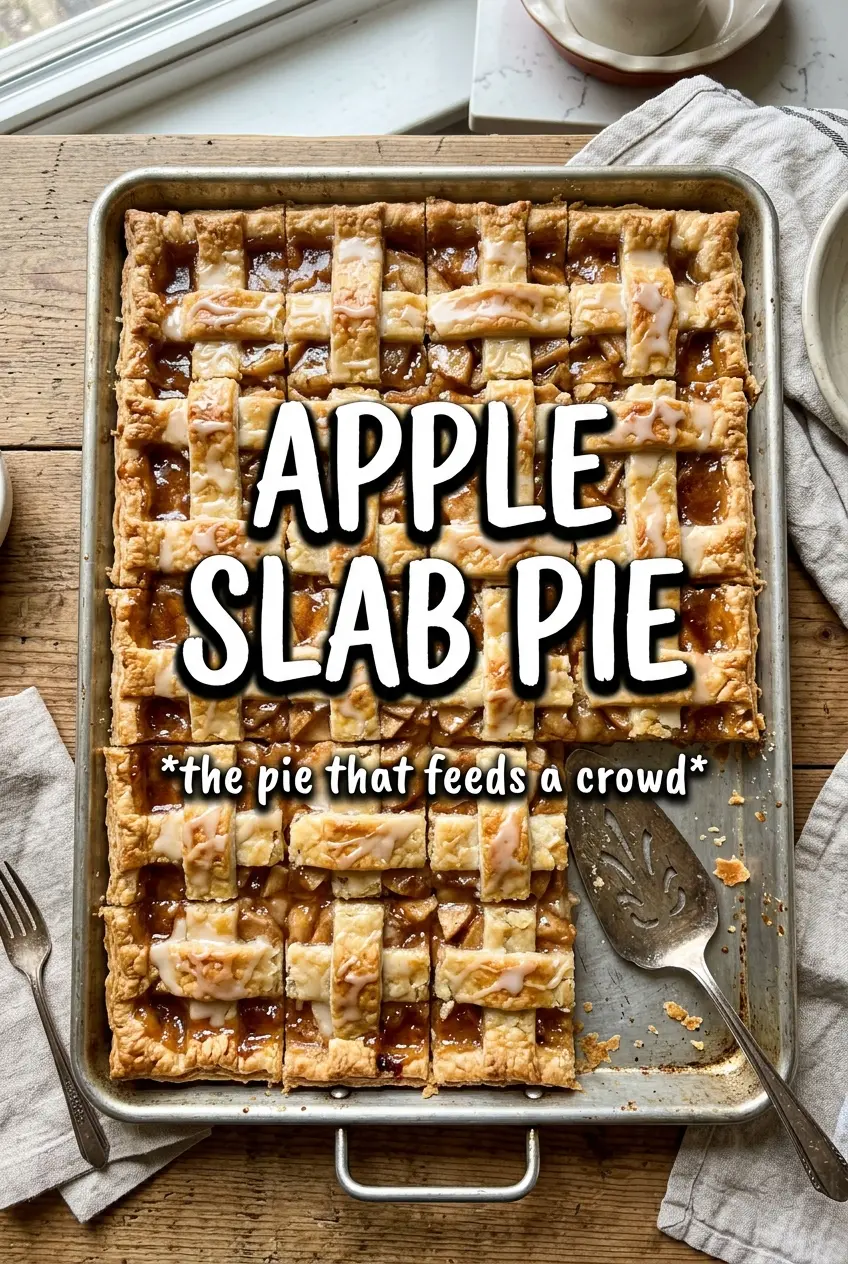
Apple Slab Pie
Ingredients
Equipment
Method
- Preheat the oven to 400°F so it reaches full heat before baking.
- Press two pie crusts together into a lightly greased 15x10 rimmed baking sheet and prick the bottom with a fork.
- Toss apple slices with granulated sugar, brown sugar, cinnamon, nutmeg, allspice, cornstarch, and lemon juice until evenly coated.
- Spread the apple filling over the crust and dot with the diced butter.
- Top with the remaining two pie crusts pressed together and crimp the edges to seal.
- Brush the top with the beaten egg, then sprinkle with cinnamon sugar for a crisp, golden finish.
- Cut steam vents into the top so trapped steam can escape during baking.
- Bake for 40-45 minutes at 400°F until the slab pie is golden and bubbling around the edges.
- Let the slab pie cool, then drizzle with the powdered sugar glaze made with cider or milk.


