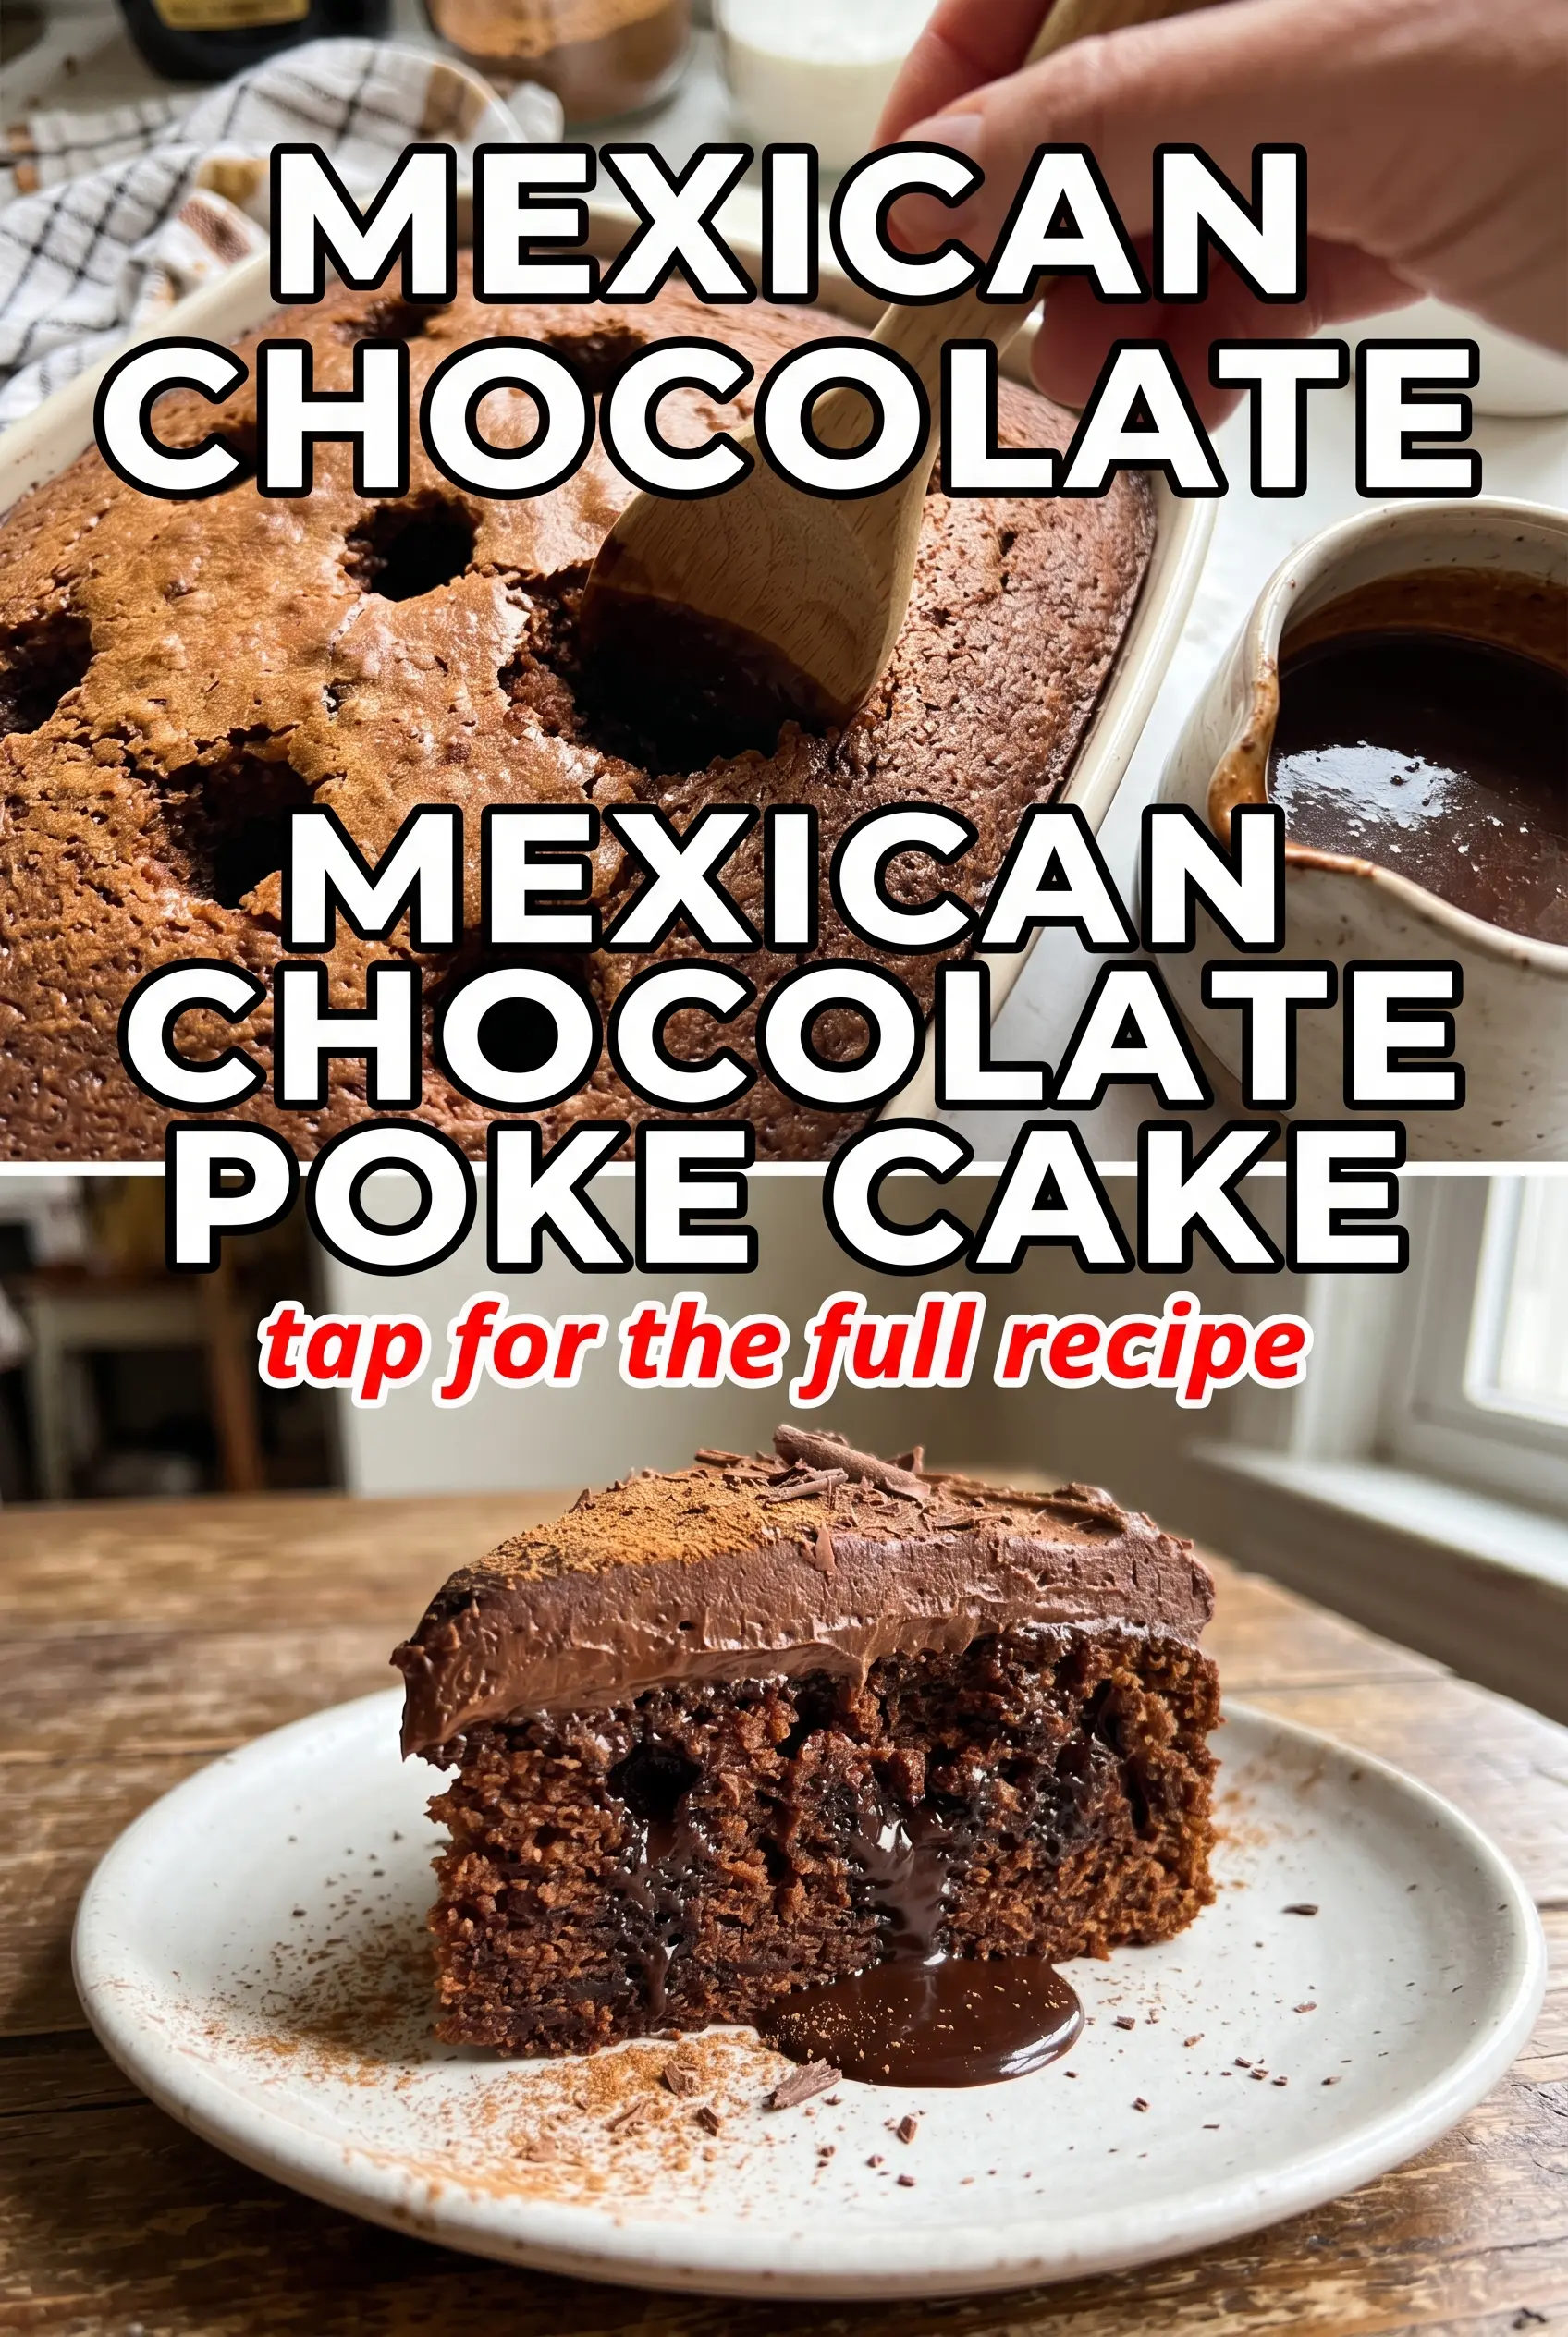
Moist chocolate cake with a warm cinnamon kick and a faint hit of cayenne is the kind of dessert people remember after the plates are cleared. The poke cake format takes it a step further: the chocolate-condensed milk soak sinks into every bite, so the crumb stays fudgy instead of drying out around the edges. A billowy cap of whipped cream and a drizzle of chocolate on top keeps the whole thing balanced and not too heavy.
The reason this version works is the contrast. Strong brewed coffee deepens the cocoa without tasting like coffee, while buttermilk keeps the cake tender enough to absorb the glaze without turning gummy. Cinnamon brings the familiar Mexican chocolate note, and the cayenne doesn’t make the cake spicy in a hot-sauce way; it just gives the chocolate a little lift at the finish. If you’ve made poke cakes before and ended up with dry pockets or a soggy top, the timing here matters. Poke it while it’s still warm, but wait until it cools completely before adding the whipped cream.
The cake stayed unbelievably moist after the chocolate soak, and the cinnamon-cayenne flavor made it taste different from the usual poke cakes. I brought it to a birthday dinner and people kept asking what was in it.
Save this Mexican Chocolate Poke Cake for the nights when you want a fudgy chocolate dessert with cinnamon heat and a glossy chocolate soak.
The Step Most Chocolate Cakes Miss: Letting the Soak Go In While the Crumb Is Still Warm
A poke cake lives or dies by timing. If the cake is too hot, the soak can run straight to the bottom and leave the top watery. If it’s fully cool, the mixture sits on the surface and never really becomes part of the cake. Warm is the sweet spot, because the crumb is still open enough to drink in the condensed milk and chocolate syrup without collapsing.
The other mistake is not poking deeply enough. The holes need to reach most of the way through the cake so the glaze has somewhere to go. I use a fork and press down in rows, then pour the topping slowly so it has time to settle instead of pooling in one corner.
What Each Ingredient Is Doing in This Cake
- Cocoa powder — This is the backbone of the cake, so use a good unsweetened cocoa if you can. Dutch-process will make a darker, smoother cake, but natural cocoa works well here because the baking soda and buttermilk help lift it.
- Strong brewed coffee — It won’t make the cake taste like mocha; it just sharpens the chocolate. If you don’t want to use coffee, hot water is the next best option, but you’ll lose some depth.
- Buttermilk — This gives the crumb tenderness and helps the cake stay soft after the soak. If you need a substitute, stir 1/2 tablespoon lemon juice or vinegar into 1/2 cup milk and let it sit for 5 minutes.
- Cinnamon and cayenne — These are what make this read as Mexican chocolate instead of plain chocolate cake. The cayenne should be subtle; if you want the heat to stay gentle, don’t go over the listed amount.
- Sweetened condensed milk and chocolate syrup — This is the soak, and the condensed milk matters because it brings both sweetness and body. A thinner chocolate sauce won’t cling the same way, so the cake won’t get that rich, fudgy texture.
- Whipped cream — Add it only after the cake is fully cool, or it will melt into the top. Homemade or store-bought both work here, though homemade holds its shape a little better if the cake sits out for a while.
Getting the Batter, Soak, and Topping in the Right Order
Mixing the Dry Ingredients First
Whisk the flour, sugar, cocoa, baking soda, baking powder, salt, cinnamon, and cayenne until the color looks even throughout. That step matters more than people think, because cocoa and spices can clump and leave one bite hotter or darker than the next. The batter comes together fast, so have the wet mixture ready before you start combining everything.
Keeping the Batter Tender
When you add the wet ingredients, fold just until the flour streaks disappear. Overmixing will tighten the crumb and make it less willing to absorb the soak later. The batter will be loose and glossy; that’s what you want for a poke cake.
Baking Until Set, Not Dry
Bake until a toothpick comes out clean or with a few moist crumbs. If the center is still wet, the soak will exaggerate that and the cake can turn dense in the middle. Pull it when the top springs back lightly and the edges start to pull away from the pan.
Poking and Pouring While Warm
As soon as the cake comes out, pierce it all over with a fork in a tight, even pattern. Then combine the condensed milk and chocolate syrup and pour it slowly over the surface, letting it seep into the holes. If you rush this part, the topping can sit on top instead of sinking in, so give it a minute between pours if needed.
Finishing With Cream and Chocolate
Let the cake cool completely before adding whipped cream and chocolate shavings. If you frost it while there’s still heat in the pan, the cream loosens and slides around. A chilled cake slices cleaner, too, so if you have the time, give it a short rest in the fridge before serving.
Three Ways to Work This Cake Into Your Own Kitchen
Make It Dairy-Free
Use a rich unsweetened non-dairy milk with 1 tablespoon vinegar for the buttermilk, then swap in a dairy-free whipped topping. The cake will still be tender, but the finish will be a little less plush than with real buttermilk and cream.
Lean Into the Heat
Add a pinch more cayenne or a tiny bit of chili powder if you want the chocolate to finish with a clear warmth. Don’t overdo it, because the point here is a slow burn behind the cocoa, not a spicy cake.
Make It Ahead for a Party
Bake and soak the cake a day ahead, then cover and chill it. Add the whipped cream and chocolate shavings just before serving so the top stays clean and the garnish keeps its shape.
Storage and Reheating
- Refrigerator: Store covered for up to 4 days. The cake gets even more pudding-like on day two, and the whipped cream may soften a little but still tastes great.
- Freezer: Freeze the cake without the whipped cream for up to 2 months. Wrap the pan tightly, then thaw overnight in the fridge before topping and serving.
- Reheating: This cake is best served chilled or at cool room temperature, not reheated. If you want to take the chill off, let a slice sit out for 15 to 20 minutes so the texture stays soft without melting the topping.
The Questions People Ask Before They Bake This Cake
Mexican Chocolate Poke Cake
Ingredients
Equipment
Method
- Preheat the oven to 350°F and grease a 9x13 inch baking pan, keeping the pan ready to pour immediately. Visual cue: the pan looks lightly coated, not pooled with oil.
- Whisk together all-purpose flour, granulated sugar, unsweetened cocoa powder, baking soda, baking powder, salt, cinnamon, and cayenne pepper until evenly combined. Visual cue: the dry mixture is uniformly brown with no spice clumps.
- Beat together eggs, strong brewed coffee (cooled), vegetable oil, buttermilk, and vanilla extract until smooth and glossy. Visual cue: the mixture turns lighter and fully emulsified.
- Fold the wet ingredients into the dry ingredients until just combined, stopping as soon as no dry pockets remain. Visual cue: thick batter with a smooth surface and no visible flour streaks.
- Pour the batter into the prepared pan and bake 30-35 minutes at 350°F, until a toothpick comes out clean. Visual cue: the center springs back slightly and the top looks set.
- While the cake is still warm, pierce all over with a fork so the holes reach throughout the crumb. Visual cue: lots of evenly spaced punctures across the entire surface.
- Combine sweetened condensed milk and chocolate syrup, then pour evenly over the warm cake to fill the holes. Visual cue: chocolate pools around edges and begins to soak in.
- Let the cake cool completely, covered if needed to prevent drying, for 30 minutes. Visual cue: the top thickens as the drizzle settles and turns glossy.
- Top the cooled cake with whipped cream in an even layer. Visual cue: soft, snowy peaks that fully cover the chocolate-syrup surface.
- Sprinkle chocolate shavings over the whipped cream right before serving. Visual cue: dark curls are scattered across the top like a finished chocolate drip garnish.


