Juicy baked chicken breasts depend on two things most people skip: even thickness and a hot oven. When both are handled well, the chicken comes out with a fragrant herb crust on the outside and meat that stays tender enough to slice cleanly without losing its juices to the cutting board.
This version uses a simple oil-and-spice rub that clings to the surface and turns savory and golden in the oven. Smoked paprika gives the chicken color and a little depth, while garlic powder, onion powder, and Italian seasoning build enough flavor that you don’t need a heavy sauce to carry the dish. Pounding the thicker ends down to the same thickness as the thin ends matters more than almost anything else here, because it keeps the lean meat from drying out before the center is cooked through.
Below, you’ll find the timing cues that matter most, the ingredient swap that keeps the chicken from tasting flat, and a few practical ways to change this up when you need something a little different.
I’ve always had trouble with baked chicken drying out, but pounding the breasts evenly and pulling them at 165 on the dot made such a difference. The seasoning formed a gorgeous crust and the slices stayed juicy all the way through.
Save these oven-baked chicken breasts for the nights when you want a golden herb crust and juicy slices without a complicated marinade.
The Main Reason Baked Chicken Turns Dry Before It Looks Done
Chicken breasts dry out fastest when the thin end finishes long before the thick end. That’s why even thickness matters here more than extra seasoning, extra oil, or a longer bake. If you’ve ever pulled chicken from the oven and found one side stringy while the other side was still catching up, that uneven shape was the problem.
A hot oven helps the surface set quickly, which gives you that lightly browned crust before the interior overshoots. The other piece of the puzzle is resting time. Cutting too early sends the juices onto the plate instead of back through the meat, and the chicken will look less moist even when it was cooked correctly.
- Pounding the chicken — This isn’t about flattening it into cutlets. It’s about bringing the thickest part down close to the thickness of the lean ends so the whole breast cooks at the same pace.
- Olive oil — The oil helps the spice mix stick and encourages browning. A neutral oil works in a pinch, but olive oil gives the crust a better savory edge.
- Smoked paprika — This is what gives the top that deeper color and a little warmth. Regular paprika will work, but the flavor won’t be as rounded.
- Resting after baking — Those five minutes are part of the cook time in practice. Skip them and the slices will shed juices the second the knife goes in.
What Each Seasoning Is Doing on the Chicken

The seasoning blend is built to do more than add salt. Garlic powder and onion powder give the chicken a cooked-all-day savory base without the risk of burning fresh garlic in a short bake. Italian seasoning brings herbs that fit the clean flavor of chicken breast, and the black pepper keeps the crust from tasting one-note.
If you want to swap anything, start with the herbs rather than the salt. Dried thyme, oregano, rosemary, or a poultry seasoning blend can stand in for Italian seasoning. The salt amount here is modest, which helps if you’re serving the chicken with a salty side or a sauce later.
- Chicken breasts — Look for breasts that are similar in size. If one is much larger than the others, slice it horizontally after baking or pound it to match the rest.
- Italian seasoning — This is flexible. Any dried herb blend with oregano and thyme in it will work and keep the crust fragrant.
- Fresh parsley and lemon — These matter more than they look on paper. The parsley gives freshness, and the lemon wakes up the chicken right before serving, especially if you’re not using a sauce.
The 22 Minutes That Matter in the Oven
Getting the Chicken Even Before It Hits the Pan
Lay the chicken between two pieces of parchment or plastic wrap and pound the thickest parts until the breasts are an even 3/4-inch thickness. You’re looking for a shape that cooks uniformly, not a paper-thin cutlet. If the chicken starts to tear, stop there; it’s thin enough. Uneven pieces are the number one reason one breast comes out dry while another still needs time.
Coating the Surface So the Spices Stick
Brush both sides with olive oil before adding the seasoning mix. Dry spices cling better to a lightly oiled surface, and the oil helps the top turn lightly caramelized instead of dusty. Press the seasoning in with your fingers so it stays put. If it looks sparse, it usually needs a more even rub rather than more spice.
Baking Until the Center Is Just Cooked
Place the chicken in a lightly greased baking dish and bake at 425°F until the thickest part reaches 165°F. Start checking early if the breasts are on the small side, because a few extra minutes can move the texture from juicy to chalky fast. The tops should look golden, the edges set, and the juices clear. If you’re relying on color alone, you’ll miss the moment the chicken is actually done.
Resting Before the First Slice
Move the chicken to a plate and leave it alone for 5 minutes. This gives the juices time to settle back into the meat instead of spilling out immediately. Slice against the grain for the cleanest bite. If the center looks slightly glossy when you cut in, that’s fine; it will finish settling as it rests.
How to Change These Baked Chicken Breasts Without Losing the Juicy Texture
Dairy-Free and Naturally Gluten-Free
This recipe already fits both of those needs. The flavor comes from oil and dried spices, so you don’t lose anything by skipping butter, cheese, or breadcrumbs. Just keep the oil coating even so the seasoning sticks and the top browns properly.
Change the Herb Profile
Swap the Italian seasoning for a poultry blend, dried thyme and rosemary, or a mix of oregano and basil. The chicken will still be savory and flexible for serving, but rosemary pushes it a little more rustic while thyme keeps it cleaner and gentler.
Add a Little Heat
A pinch of cayenne or red pepper flakes works well with the smoked paprika. Keep it light; too much heat can overpower the clean chicken flavor and make the crust taste sharp instead of balanced.
Storage and Reheating
- Refrigerator: Store in an airtight container for up to 4 days. The coating stays flavorful, though the crust softens a bit.
- Freezer: It freezes well for up to 2 months. Wrap slices tightly and freeze with as little air as possible so they don’t pick up freezer taste.
- Reheating: Reheat covered in a 300°F oven with a splash of broth or water if needed. The common mistake is blasting it in the microwave until the edges turn rubbery before the center is warm.
Answers to the Questions Worth Asking
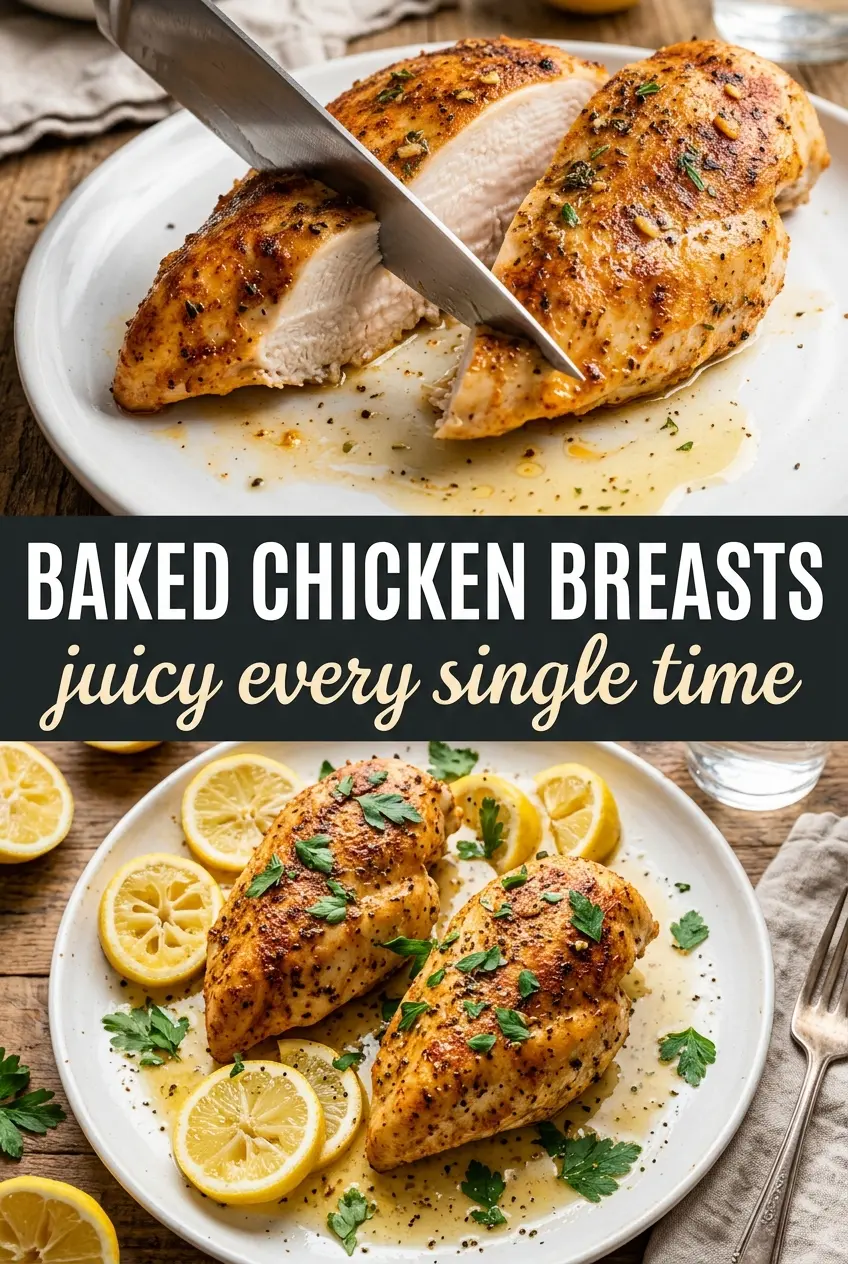
Baked Chicken Breasts
Ingredients
Equipment
Method
- Preheat the oven to 425°F and lightly grease a baking dish so the chicken starts cooking immediately.
- Pound the chicken breasts to an even 3/4-inch thickness if they vary in size, aiming for uniform cooking throughout.
- Brush both sides of each chicken breast with olive oil to help the crust brown.
- Mix garlic powder, onion powder, smoked paprika, Italian seasoning, salt, and pepper, then rub evenly over both sides and cover any dry spots.
- Bake at 425°F for 18-22 minutes until the internal temperature reaches 165°F and the tops look golden.
- Rest the chicken for 5 minutes before slicing so the juices settle, then garnish with fresh parsley and lemon wedges for serving.


