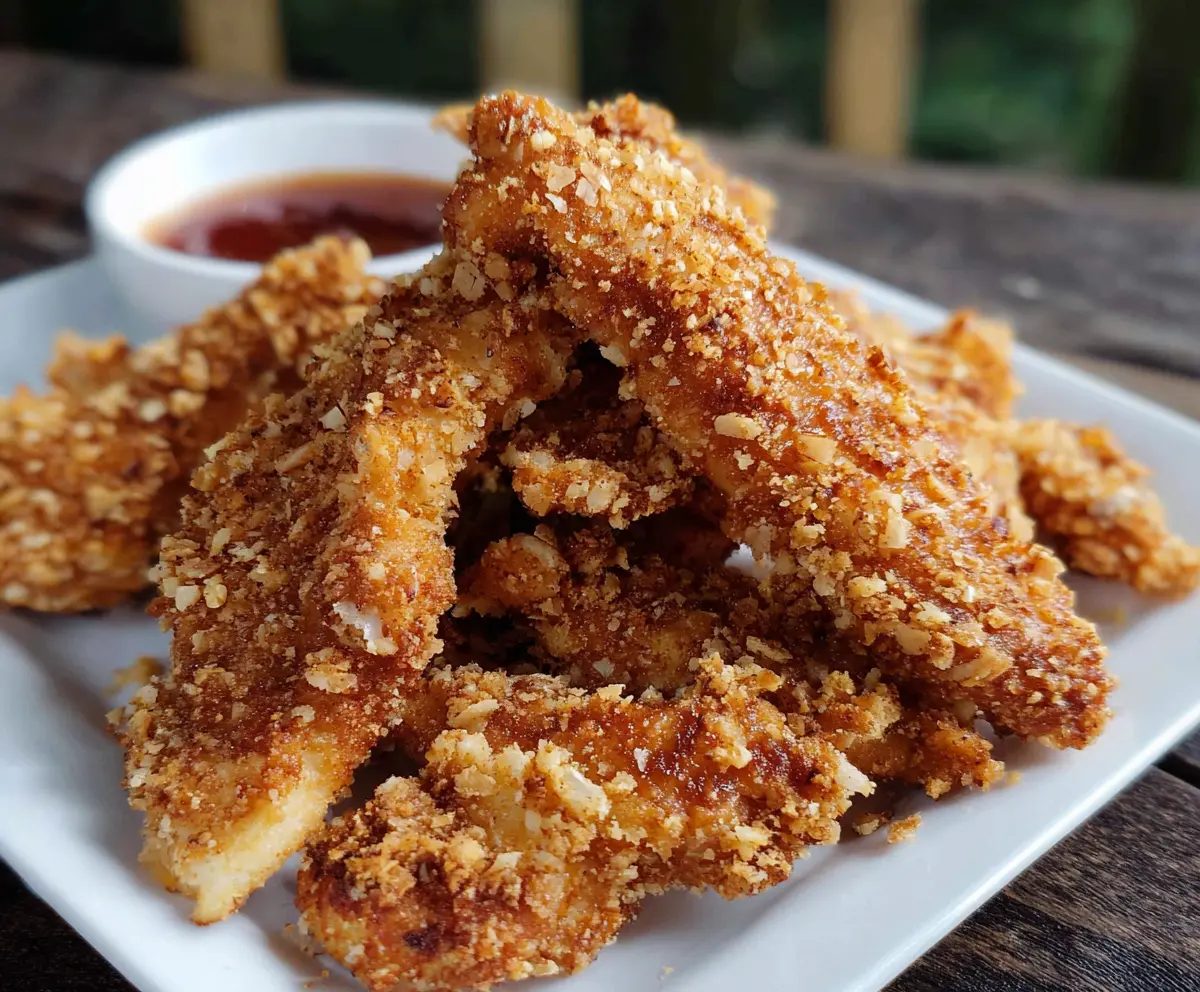
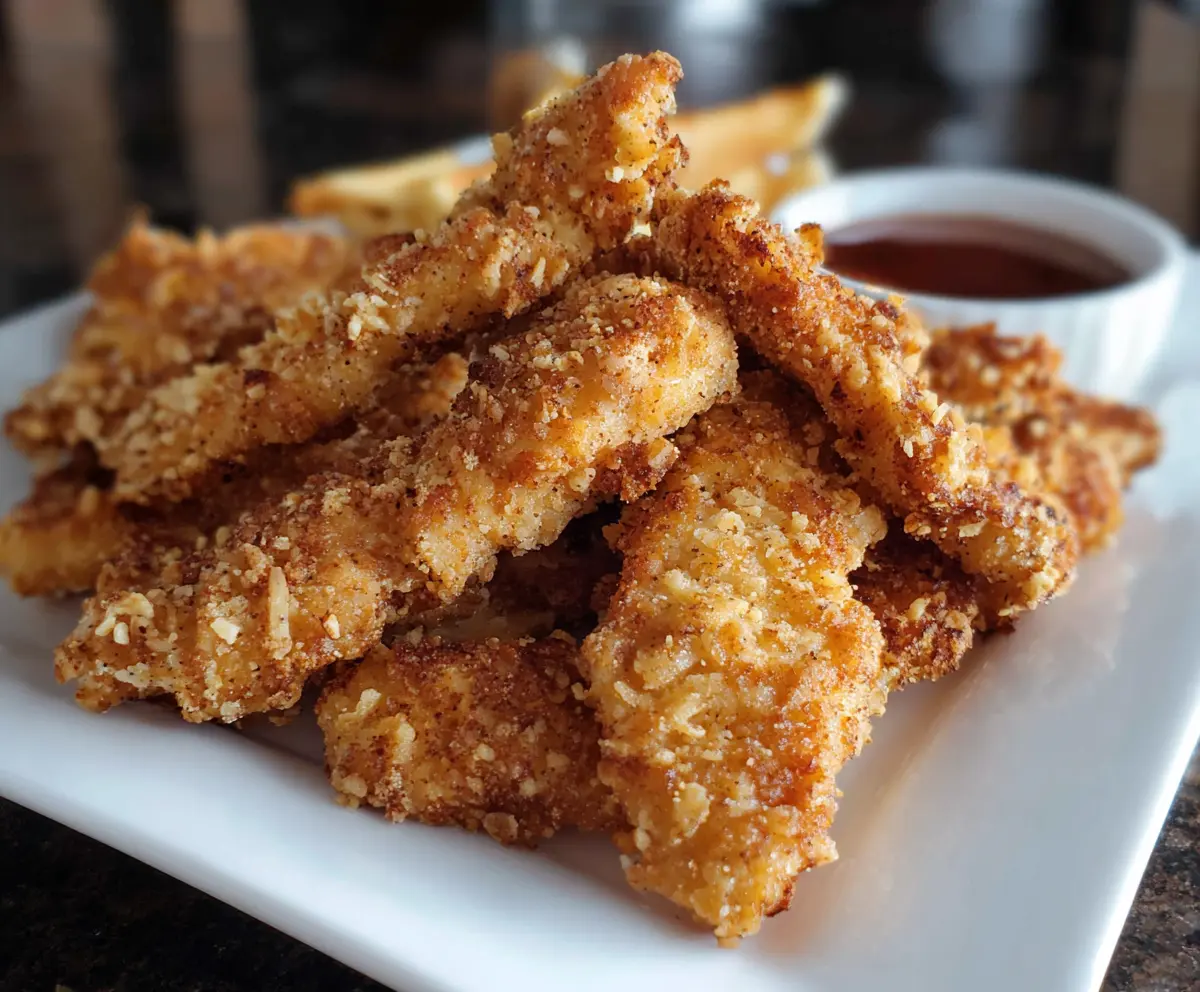
These Sourdough Discard Chicken Strips are a fun twist on a classic favorite! With a crispy coating made from sourdough, they bring flavor and crunch to every bite.
I love making these strips because they turn leftover sourdough into something tasty. Dipping them in your favorite sauce? Yes, please! Perfect for a quick snack or a dinner side. 🍗
Key Ingredients & Substitutions
Sourdough Discard: This is the star of the show! It adds a tangy flavor and helps the coating stick. If you don’t have sourdough discard, you can use regular buttermilk or yogurt for a similar effect.
Chicken: I recommend using chicken breasts for tenderness. However, thighs work well too! For a lighter option, try using tofu strips or vegetable tenders.
Breadcrumbs: Traditional breadcrumbs give a nice crunch, but feel free to substitute with crushed cornflakes or panko for extra crispiness. You can also use gluten-free alternatives if needed.
Spices: Garlic powder and paprika enhance the flavor. You can play around with spices like cayenne for heat or Italian seasoning for a different twist!
How Do I Get a Crispy Coating on the Chicken Strips?
Getting a crispy coating is all about the method! Here’s how to nail it:
- Make sure to pat the chicken strips dry first; this helps the flour stick better.
- Dredging in flour before the egg wash is crucial. It creates a base for the wet batter to adhere to.
- Let the coated chicken rest for 5 minutes before frying. This helps the coating set, making it less likely to fall off.
- Keep your oil hot—around 350°F (175°C) is ideal. This cooks the chicken quickly, sealing in moisture and creating a crispy outer layer.
- Don’t overcrowd the pan when frying. Fry in batches so the temperature stays consistent!
Using these tips will ensure your sourdough discard chicken strips come out perfectly crispy every time! Enjoy your cooking!
How to Make Sourdough Discard Chicken Strips
Ingredients You’ll Need:
For the Chicken Strips:
- 2 cups sourdough discard (discarded starter, unfed)
- 1 lb (450g) chicken breast strips or tenders
For the Coating:
- 1 cup all-purpose flour (for dredging)
- 2 large eggs
- 1 cup breadcrumbs (or crushed crackers/cereal for extra crunch)
- 1 teaspoon garlic powder
- 1 teaspoon paprika
- 1/2 teaspoon salt
- 1/2 teaspoon black pepper
- 1/2 teaspoon onion powder
For Frying:
- Cooking oil (such as vegetable or canola) for frying
How Much Time Will You Need?
This recipe will take about 15 minutes of prep time and around 10-15 minutes for frying. Perfect for a quick meal or snack!
Step-by-Step Instructions:
1. Prepare the Chicken:
Start by patting the chicken strips dry with paper towels. This helps the coating stick and prevents any excess moisture from causing the strips to steam instead of fry.
2. Make the Wet Batter:
In a shallow bowl, mix the sourdough discard and eggs until smooth. This mixture will serve as a flavorful wet batter that clings to your chicken strips.
3. Prepare the Dry Coating:
In another bowl, combine the flour, garlic powder, paprika, onion powder, salt, and pepper. Mix well to ensure the spices are evenly distributed.
4. Set Up for Breading:
In a third bowl, place the breadcrumbs. This will be your final coating that gives the strips their crunchy texture!
5. Dredge the Chicken:
First, take a chicken strip and dip it into the seasoned flour, coating it well. Shake off any excess flour.
6. Coat with Wet Batter:
Next, dip the floured chicken strip into the sourdough discard mixture, making sure it’s fully coated.
7. Final Coating:
Finally, press the coated chicken strip into the breadcrumbs, ensuring it’s fully covered for that satisfying crunch.
8. Let Them Rest:
Place the coated chicken strips on a plate and let them rest for about 5 minutes. This helps the coating to set nicely before frying.
9. Heat the Oil:
In a large skillet, heat about 1 inch of cooking oil over medium heat. Once the oil is hot (around 350°F or 175°C), you’re ready to fry!
10. Fry the Chicken Strips:
Carefully place the chicken strips into the hot oil, frying in batches to avoid overcrowding. Fry for 3-4 minutes on each side or until they are golden brown and fully cooked (internal temperature should be 165°F or 75°C).
11. Drain and Serve:
Once cooked, remove the chicken strips and drain them on a paper towel-lined plate to absorb any excess oil.
12. Enjoy!
Serve the crunchy chicken strips hot with your favorite dipping sauce, whether it’s ketchup, honey mustard, or barbecue sauce. Enjoy your delicious creation!
Can I Use Other Proteins Besides Chicken?
Absolutely! You can substitute chicken with tofu, shrimp, or even zucchini sticks for a vegetarian option. Just adjust the cooking time as necessary, especially for shrimp and tofu, which will cook quicker than chicken.
How Long Can I Store Leftovers?
Leftover chicken strips can be stored in an airtight container in the fridge for up to 3 days. To reheat, place them in the oven at 350°F (175°C) for about 10-15 minutes to get them crispy again.
What’s the Best Way to Freeze These Chicken Strips?
To freeze, let the cooked chicken strips cool completely. Place them in a single layer on a baking sheet and freeze until solid. Then, transfer them to a freezer-safe bag. They can be frozen for up to 3 months. To reheat, bake from frozen at 400°F (200°C) until heated through.
Can I Make the Coating Spicier?
Definitely! You can add cayenne pepper or crushed red pepper flakes to the seasoning mix to kick up the heat level. Just adjust to your taste preference!