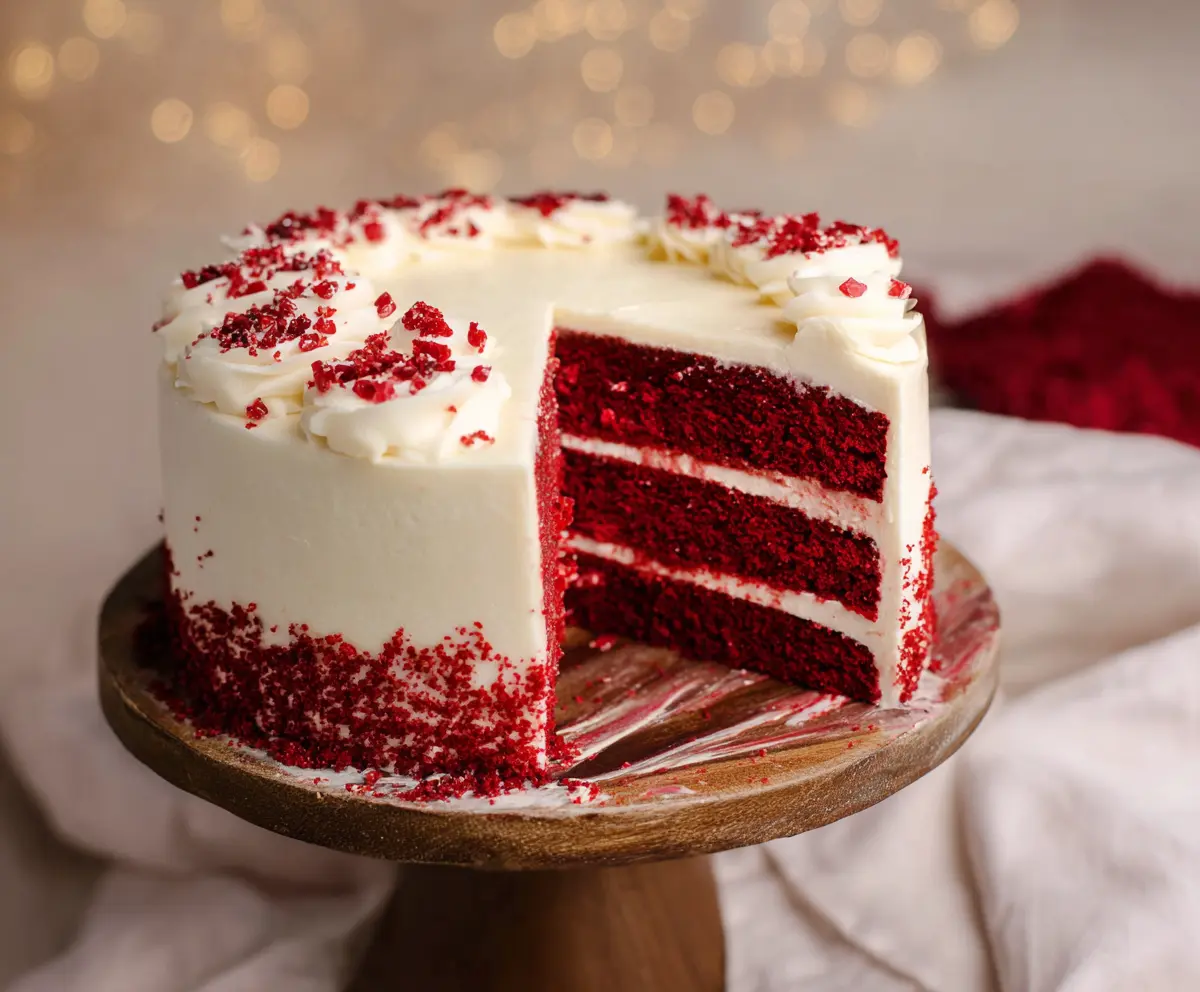
This beautiful red velvet cake is both soft and delicious, with a lovely hint of cocoa. Topped with rich cream cheese frosting, it’s a treat for the eyes and the taste buds!
Making this cake is a fun way to brighten up any celebration—just be ready for some cake leftovers that will surely disappear fast! Who can resist seconds? 😉
I love how the vibrant color makes any occasion feel special. Plus, it’s easy to slice and serve—perfect for sharing with friends and family!
Key Ingredients & Substitutions
All-purpose flour: This is essential for the cake’s structure. You can use cake flour for a lighter texture—just reduce the amount slightly, as cake flour is more absorbent.
Buttermilk: It’s key for moisture and tenderness. If you don’t have buttermilk, mix one cup of milk with a tablespoon of vinegar or lemon juice and let it sit for 5-10 minutes.
Red food coloring: This gives the cake its iconic color. If you’re seeking a natural option, you can use beet juice, but keep in mind it may slightly alter taste and color.
Cream cheese: This is what makes the frosting rich and tangy. If you want a lighter version, you can substitute half the cream cheese with Greek yogurt. It will still taste delicious!
How Do I Ensure My Cake is Moist and Flavorful?
Getting a moist and flavorful cake comes down to a couple of key techniques. First, don’t overmix your batter after adding the wet and dry ingredients; mix just until combined to avoid a dense texture.
- Use room temperature ingredients: It helps them blend together smoothly for an even batter.
- Check your cakes a few minutes before the timer goes off. Every oven is different, so pull them out when a toothpick inserted comes out clean.
- Allow your cakes to fully cool in the pans for a bit before transferring to a rack. This avoids them falling apart.

Red Velvet Cake
Ingredients You’ll Need:
For the Cake:
- 2 1/2 cups (315 g) all-purpose flour
- 1 1/2 cups (300 g) granulated sugar
- 1 teaspoon baking soda
- 1 teaspoon fine salt
- 1 teaspoon cocoa powder (unsweetened)
- 1 1/2 cups (360 ml) vegetable oil
- 1 cup (240 ml) buttermilk, room temperature
- 2 large eggs, room temperature
- 2 tablespoons (30 ml) red food coloring
- 1 teaspoon white distilled vinegar
- 1 teaspoon vanilla extract
For the Cream Cheese Frosting:
- 16 ounces (450 g) cream cheese, softened
- 1/2 cup (115 g) unsalted butter, softened
- 4 cups (480 g) powdered sugar, sifted
- 1 teaspoon vanilla extract
- A pinch of salt
How Much Time Will You Need?
This red velvet cake takes about 30 minutes of prep time and 25-30 minutes to bake. Plus, you’ll want to chill it for at least an hour after frosting. In total, set aside around 2 hours so you can enjoy the process!
Step-by-Step Instructions:
1. Prepare for Baking:
Start by preheating your oven to 350°F (175°C). Grease and flour three 8-inch round cake pans or line them with parchment paper to prevent sticking.
2. Mix Dry Ingredients:
In a medium bowl, sift together the all-purpose flour, granulated sugar, baking soda, salt, and cocoa powder. This step ensures that everything is well combined. Set this bowl aside while you mix the wet ingredients.
3. Combine Wet Ingredients:
In a large bowl, whisk together the vegetable oil, buttermilk, eggs, red food coloring, vinegar, and vanilla extract until everything is well mixed and smooth.
4. Make the Batter:
Now, gradually add the dry mixture to the wet mixture, mixing on low speed or by hand just until combined. Be careful not to overmix, as this can make your cake tough!
5. Bake the Cakes:
Divide the batter evenly among the prepared pans. Bake for 25 to 30 minutes, or until a toothpick inserted into the center comes out clean. Keep an eye on them for the best result!
6. Cool:
Once baked, let the cakes cool in the pans for about 10 minutes. Then, gently turn them out onto wire racks to cool completely. This helps prevent moisture loss.
7. Make the Cream Cheese Frosting:
In another bowl, beat the softened cream cheese and butter together on medium speed until they’re smooth and creamy. Gradually add the sifted powdered sugar, mixing until everything is incorporated and smooth. Finally, mix in the vanilla extract and a pinch of salt until the frosting is fluffy.
8. Assemble the Cake:
Place one cake layer on your serving plate. Spread about a third of the cream cheese frosting evenly over the top. Add the second layer and repeat, adding frosting on top. Finish with the third layer.
9. Frost the Outside:
Use the remaining frosting to cover the sides and top of the cake. Take your time to smooth it out nicely.
10. Decorate:
If you like, sprinkle some red velvet cake crumbs or colorful sprinkles around the base or on top of the cake for a lovely finish, just like the picture!
11. Chill and Serve:
Lastly, refrigerate the cake for at least 1 hour to allow the frosting to set. Once ready, slice and enjoy your beautiful red velvet creation!
This recipe yields a moist, vibrant red velvet cake, perfect for celebrations or just a sweet treat at home. Enjoy!
Can I Use Unsweetened Cocoa Powder Instead of Sweetened?
Yes, unsweetened cocoa powder is typically used in red velvet cakes. It adds just the right hint of chocolate flavor without making the cake too sweet. Just stick to the amount specified in the recipe!
Can I Make This Cake Gluten-Free?
You can! Substitute the all-purpose flour with a gluten-free all-purpose flour blend. Make sure it includes xanthan gum or add it separately to help with the cake’s structure.
How Should I Store Leftover Cake?
Store leftover cake in an airtight container in the refrigerator to keep it fresh. It can last for about 3-5 days. For longer storage, consider freezing individual slices wrapped tightly in plastic wrap for up to 3 months. Just thaw in the fridge when ready to enjoy!
Can I Use a Different Frosting?
Absolutely! While cream cheese frosting is traditional, you can use buttercream, whipped cream, or even a chocolate ganache for a different flavor profile. Just ensure the frosting complements the cake’s sweetness!