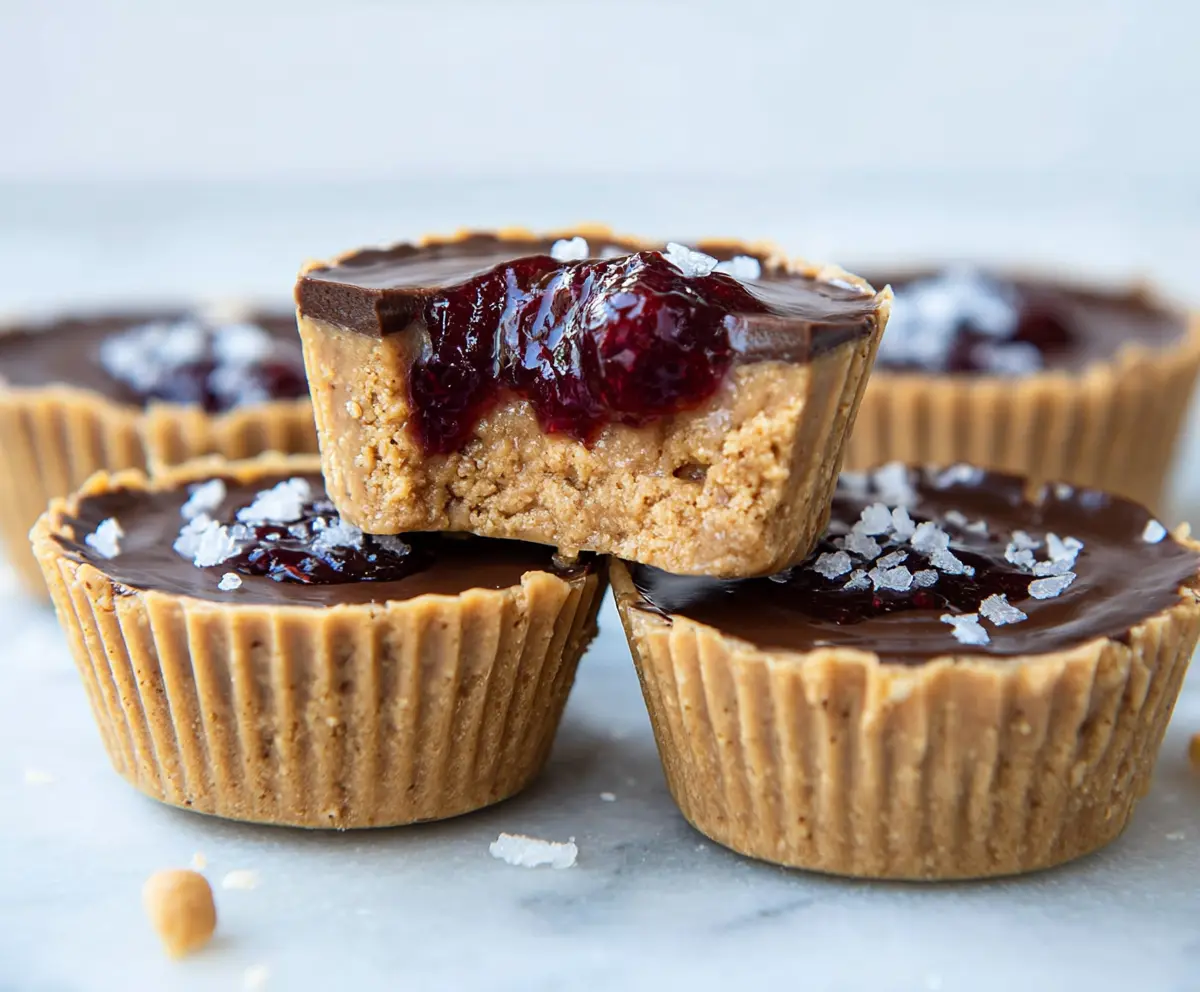
These Healthy Peanut Butter and Jelly Cups are a fun twist on a classic treat! They have a rich peanut butter filling topped with a fruity layer that makes them delicious and nutritious.
I love how easy they are to make, and they satisfy my sweet tooth without the guilt. Plus, they’re perfect for an afternoon snack—just don’t blame me if you eat them all in one sitting! 😂
Key Ingredients & Substitutions
Peanut Butter: Go for natural creamy peanut butter without added sugars or oils for the best flavor and texture. If you’re allergic, try almond butter or sunflower seed butter as alternatives.
Coconut Oil: This adds a nice texture and helps keep the cups from being too hard when chilled. Unsalted butter can be used instead, but coconut oil adds a hint of flavor and keeps these dairy-free.
Sweetener: I use maple syrup for its rich taste but honey is a great alternative if you’re not vegan. You could also use agave syrup or a sugar substitute like stevia if you want to cut calories.
Dark Chocolate Chips: I suggest using chocolate with at least 70% cacao for a deeper flavor. If you prefer milk chocolate, that’s fine, but keep in mind it adds more sugar.
Fruit Jelly: Use your favorite fruit jelly, and consider no-sugar-added varieties for a healthier option. If you’re experimenting, try using mashed bananas or pureed strawberries for a fun twist!
How Do I Get the Chocolate Layer Smooth and Shiny?
Melted chocolate can sometimes be tricky, but here’s how to get it just right:
- Always melt in short bursts in the microwave (20 seconds at a time) and stir in between. This helps prevent burning.
- Adding coconut oil right into the chocolate makes it smoother and gives it a nice sheen once set.
- After pouring the melted chocolate over the cups, tap the tin gently on the counter to even out the chocolate layer.
Remember, patience is key! Let the cups chill in the fridge to allow everything to set up nicely. Enjoy making these delightful treats!
Healthy Peanut Butter And Jelly Cups
Ingredients You’ll Need:
- 1 cup natural creamy peanut butter (no added sugar or salt)
- 1/4 cup coconut oil, melted (or unsalted butter, melted)
- 1/4 cup maple syrup or honey
- 1 teaspoon vanilla extract
- 1 pinch of salt
- 1/2 cup dark chocolate chips (70% cacao or higher)
- 2 tablespoons coconut oil (for chocolate layer)
- 3 tablespoons fruit jelly or preserves (preferably no sugar added, such as raspberry or strawberry)
- Optional: sea salt flakes for topping
How Much Time Will You Need?
This recipe takes about 15 minutes to prepare, plus 1-2 hours to chill in the refrigerator. You’ll spend just a little time mixing, layering, and melting chocolate, and then let them set in the fridge. It’s super easy!
Step-by-Step Instructions:
1. Prepare Your Muffin Tin:
Start by lining a muffin tin with paper liners or using silicone cupcake molds. This makes it easy to remove the cups later.
2. Make the Peanut Butter Mixture:
In a medium bowl, combine the natural creamy peanut butter, melted coconut oil, maple syrup (or honey), vanilla extract, and a pinch of salt. Stir everything together until it’s smooth and creamy. This will be the delicious base layer!
3. Fill the Muffin Liners:
Spoon the peanut butter mixture into each muffin liner, filling them about two-thirds full. Use the back of a spoon to smooth out the tops so they look nice and even.
4. Add the Jelly Layer:
Take about half a teaspoon of your chosen jelly and drop it in the center of each peanut butter cup. Gently press down on the jelly with a spoon to sink it a little into the peanut butter layer, but be careful not to mix them too much.
5. Melt the Chocolate:
In a small microwave-safe bowl, mix the dark chocolate chips and the coconut oil (for the chocolate layer). Microwave in 20-second intervals, stirring in between, until it’s completely melted and smooth. This will be the yummy topping!
6. Top with Chocolate:
Carefully spoon the melted chocolate over the peanut butter and jelly layers, making sure to cover them completely. It’s okay to be generous with the chocolate!
7. Add Optional Toppings:
If you like, sprinkle a pinch of sea salt flakes on top of the chocolate layer for a tasty contrast.
8. Chill to Set:
Place the filled muffin tin in the refrigerator for about 1-2 hours, or until the cups are firm and set. This step is important to help everything hold together when you take them out.
9. Serve and Enjoy:
Once set, carefully remove the cups from the liners and store them in an airtight container in the fridge. Enjoy your healthy peanut butter and jelly cups as a satisfying and nutritious snack!
Can I Use Natural Crunchy Peanut Butter Instead?
Absolutely! Natural crunchy peanut butter will give your cups added texture and a delightful crunch. Just make sure it’s similarly unsweetened for the best flavor.
How Long Can I Store These Cups?
You can store the healthy peanut butter and jelly cups in an airtight container in the fridge for up to one week. Just be sure to keep them chilled to maintain their firm texture!
Can I Use Other Jellies or Preserves?
Yes! Feel free to use any flavor of jelly or preserves that you love, such as grape, apricot, or even homemade fruit spreads. Just check for sugar content if you’re looking for a healthier option.
What if I Don’t Have Muffin Liners?
No worries! You can use a silicone muffin tray, which makes it easy to pop out the cups without sticking. Alternatively, you can grease a standard muffin tin lightly with coconut oil beforehand to prevent sticking.