I love finding easy ways to make snack time better. Today, I’m sharing two simple recipes for Greek yogurt peanut butter cups that are perfect for a quick treat or a healthy protein boost.
These peanut butter cup recipes use creamy Greek yogurt and your favorite peanut butter to create a delightful, chilled snack. They are super easy to put together and taste amazing!
Jump to Recipe:
Greek Yogurt Peanut Butter Cups for a Simple Snack
These Greek yogurt peanut butter cups are a fantastic simple treat. They combine the creamy goodness of yogurt with the rich taste of peanut butter for a refreshing snack.
They are quick to prepare and perfect when you need something sweet without a lot of effort.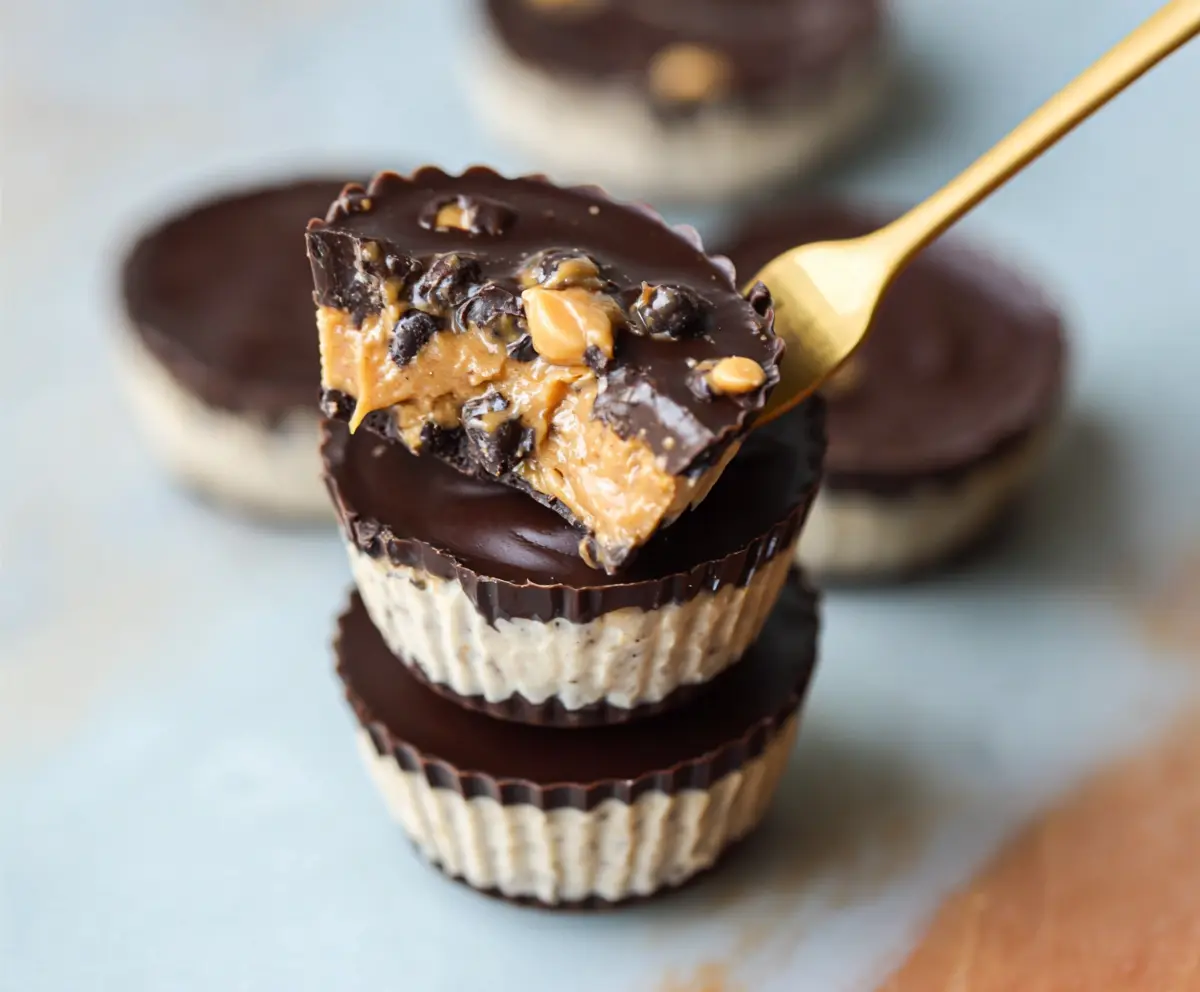
Key Ingredients & Tips for Peanut Butter Cups
- Use Thick Greek Yogurt: A thicker plain Greek yogurt will give your cups a firmer and more creamy texture when frozen.
- Natural Peanut Butter: Choose a natural, creamy peanut butter without added sugars for the best flavor balance and texture.
- Adjust Sweetness: Taste the mixture before freezing and add more maple syrup or honey if you like it sweeter.
What You Need for Greek Yogurt Cups
- 1 cup plain Greek yogurt (full-fat recommended for creaminess)
- 1/2 cup creamy peanut butter
- 2-3 tablespoons maple syrup or honey (adjust to taste)
- 1/4 cup chocolate chips (optional, for topping)
- Mini muffin liners
⏱️ Time: 15 minutes prep + 1 hour freeze🍽️ Yields: 8-10 cups
How to Make Your Greek Yogurt Peanut Butter Cups
Step 1: Prepare Your Liners
Line a mini muffin tin with paper liners. This will make it easy to remove your finished peanut butter cups.
Step 2: Mix the Peanut Butter Yogurt Base
In a medium bowl, combine the Greek yogurt, creamy peanut butter, and maple syrup or honey. Stir these ingredients together until the mixture is smooth and fully blended.
Step 3: Assemble and Freeze Your Cups
Spoon the yogurt and peanut butter mixture evenly into each mini muffin liner. If you like, sprinkle a few chocolate chips on top of each cup. Place the muffin tin in the freezer for at least 1 hour, or until the cups are firm.
📝 Final Note on Storage
Keep these Greek yogurt peanut butter cups stored in an airtight container in the freezer. This will help them stay firm and fresh for when you want a quick snack!
Greek Yogurt Peanut Butter Protein Cups for Energy
If you’re looking for an extra boost in your snack, these Greek yogurt peanut butter protein cups are perfect. They’re packed with protein to help you feel full and energized.
This version is great for a post-workout treat or when you need a little more fuel in your day.
Key Ingredients & Tips for Protein Cups
- Choose Your Protein Powder: Vanilla or unflavored whey protein powder works best. Make sure it blends well to avoid a grainy texture.
- Consistency Matters: Protein powder can thicken the mixture. If it’s too thick, add a tiny splash of milk to get a smooth consistency.
- Taste Before Freezing: Protein powders vary in sweetness. Taste your mix before you freeze it and adjust the maple syrup or honey as needed.
What You Need for Greek Yogurt Protein Cups
- 1 cup plain Greek yogurt (full-fat for best texture)
- 1/2 cup creamy peanut butter
- 1 scoop (approx. 30g) vanilla or unflavored protein powder
- 1-2 tablespoons maple syrup or honey (adjust to taste)
- 1/4 cup chocolate chips (optional, for topping)
- Mini muffin liners
⏱️ Time: 15 minutes prep + 1 hour freeze🍽️ Yields: 8-10 cups
How to Make Your Greek Yogurt Peanut Butter Protein Cups
Step 1: Get Your Muffin Liners Ready
Prepare a mini muffin tin by lining each cup with a paper liner. This makes the cups easy to handle once they are frozen.
Step 2: Combine All Ingredients for the Protein Mix
In a mixing bowl, add the Greek yogurt, creamy peanut butter, protein powder, and maple syrup or honey. Stir well until all ingredients are completely combined and the mixture is smooth.
Step 3: Fill and Chill Your Protein Cups
Spoon the protein-packed mixture into each prepared muffin liner. If you want, sprinkle chocolate chips on top. Place the muffin tin into the freezer for at least 1 hour, or until the cups are firm enough to eat.
📝 Final Note for Protein Lovers
These protein cups are best kept in the freezer in a sealed container. They’re a super handy grab-and-go option for a quick protein boost any time you need it.