These Easter Egg Nest Cupcakes are as fun to make as they are to eat! With fluffy chocolate or vanilla cupcakes topped with creamy frosting, they’re a springtime treat for everyone.
The best part? The colorful candy eggs on top that give them a playful twist! I love baking these with my kids—they always enjoy making little nests and hiding the eggs. Perfect for sharing or even for a sweet surprise!
Key Ingredients & Substitutions
All-Purpose Flour: Essential for structure in the cupcakes. If you need a gluten-free option, try almond flour or a gluten-free all-purpose blend—but be aware that textures may vary.
Granulated Sugar: Adds sweetness to the cupcakes. You can use coconut sugar for a less processed alternative, but keep in mind it may result in a darker color.
Cocoa Powder: This gives chocolate cupcakes their flavor. For a rich taste, opt for dark cocoa powder. If you’re not keen on cocoa, skip it and stick with vanilla for a classic flavor.
Buttermilk: It adds moisture and tang. If you don’t have buttermilk, you can easily mix milk with 1 tablespoon of vinegar and let it sit for 5 minutes to create a similar effect.
Unsalted Butter: Used in both frostings for a creamy texture. You can replace it with vegan butter for a dairy-free version.
Yellow Gel Food Coloring: This brightens up the buttercream. If you prefer natural coloring, use turmeric for a golden hue, but be mindful of the flavor change.
How Do You Get a Smooth Cake Batter?
Mixing the batter correctly is key for light and fluffy cupcakes. Start by whisking your dry ingredients separately to aerate them. When blending in wet ingredients, combine them just until there are no lumps—overmixing can make your cupcakes tough. Keep it gentle!
What’s the Best Way to Frost Cupcakes?
Frosting can make or break your cupcake! Use a small round piping tip for the chocolate nests and a star tip for the yellow buttercream. Make sure the chocolate frosting is a workable consistency. If it’s too thick, add a little more cream until it’s easy to pipe without losing shape.
How Can You Achieve a Bright Color in Buttercream?
Getting the perfect yellow color is easy with gel food coloring. Add it gradually and mix well. Start with a little, then add more until you reach your desired brightness. Remember, gel food coloring is much more concentrated than liquid, so go slowly!
How to Assemble Your Cupcakes Neatly?
When piping the nests and centers, hold your piping bag perpendicular to the cupcake and maintain a steady pressure. For the nests, pipe around the edges and create height. For the yellow center, pipe in the middle and pull up gently to create a nice dollop. Practice makes perfect!
Festive Easter Egg Nest Cupcakes
Ingredients You’ll Need:
For the Cupcakes:
- 1 ½ cups all-purpose flour
- 1 cup granulated sugar
- ¼ cup cocoa powder (if making chocolate cupcakes)
- 1 tsp baking soda
- ½ tsp salt
- 1 cup buttermilk (or milk with 1 tbsp vinegar)
- ½ cup vegetable oil
- 2 large eggs
- 2 tsp vanilla extract
For the Chocolate Nest Frosting:
- 1 cup semi-sweet chocolate chips
- 2 tbsp unsalted butter
- 1 cup powdered sugar
- 2-3 tbsp heavy cream or milk
- 1 tsp vanilla extract
For the Yellow Buttercream Nest Center:
- 1 cup unsalted butter, softened
- 3-4 cups powdered sugar
- 2-3 tbsp milk or heavy cream
- 1 tsp vanilla extract
- Yellow gel food coloring
For Decorations:
- Mini pastel candy eggs or jelly beans (in colors like purple, blue, green, and yellow)
How Much Time Will You Need?
This delightful cupcake recipe will take about 30 minutes for preparation, with an additional 18-22 minutes for baking. After baking, let your cupcakes cool completely, which might take around 30 minutes. In total, you’re looking at about 1 hour and a bit more for assembly and decorating. Worth the wait for a festive treat!
Step-by-Step Instructions:
1. Preheat and Prepare the Pans:
Start by preheating your oven to 350°F (175°C). Meanwhile, grab a 12-cup muffin tin and line it with colorful cupcake liners. This will make your cupcakes look extra festive!
2. Make the Cupcakes:
In a large mixing bowl, whisk together the all-purpose flour, granulated sugar, cocoa powder (if you’re making chocolate cupcakes), baking soda, and salt. In another bowl, beat together the buttermilk, vegetable oil, eggs, and vanilla extract until well combined. Slowly mix the wet ingredients into the dry mixture, stirring until you have a smooth batter.
3. Bake the Cupcakes:
Fill each cupcake liner about two-thirds full with the batter. Place the muffin tin in the oven and bake for 18-22 minutes. You’ll know they are done when a toothpick inserted into the center comes out clean. Once baked, let your cupcakes cool completely on a wire rack—this is key for great frosting later!
4. Prepare the Chocolate Nest Frosting:
In a microwave-safe bowl, melt the chocolate chips and butter together in 20-second intervals, stirring in between until you have a smooth mixture. Let it cool a little before adding the powdered sugar, vanilla extract, and 2 tablespoons of heavy cream. Beat the mixture until it’s smooth and pipeable. If it’s too thick, add a bit more cream until you reach a consistency that’s easy to pipe.
5. Make the Yellow Buttercream:
In a separate bowl, beat the softened butter using a mixer until it’s creamy. Gradually add in the powdered sugar, alternating with your choice of milk or cream, mixing well after each addition. Then, stir in the vanilla extract and add yellow gel food coloring until you achieve a bright, sunny shade. Beat until fluffy!
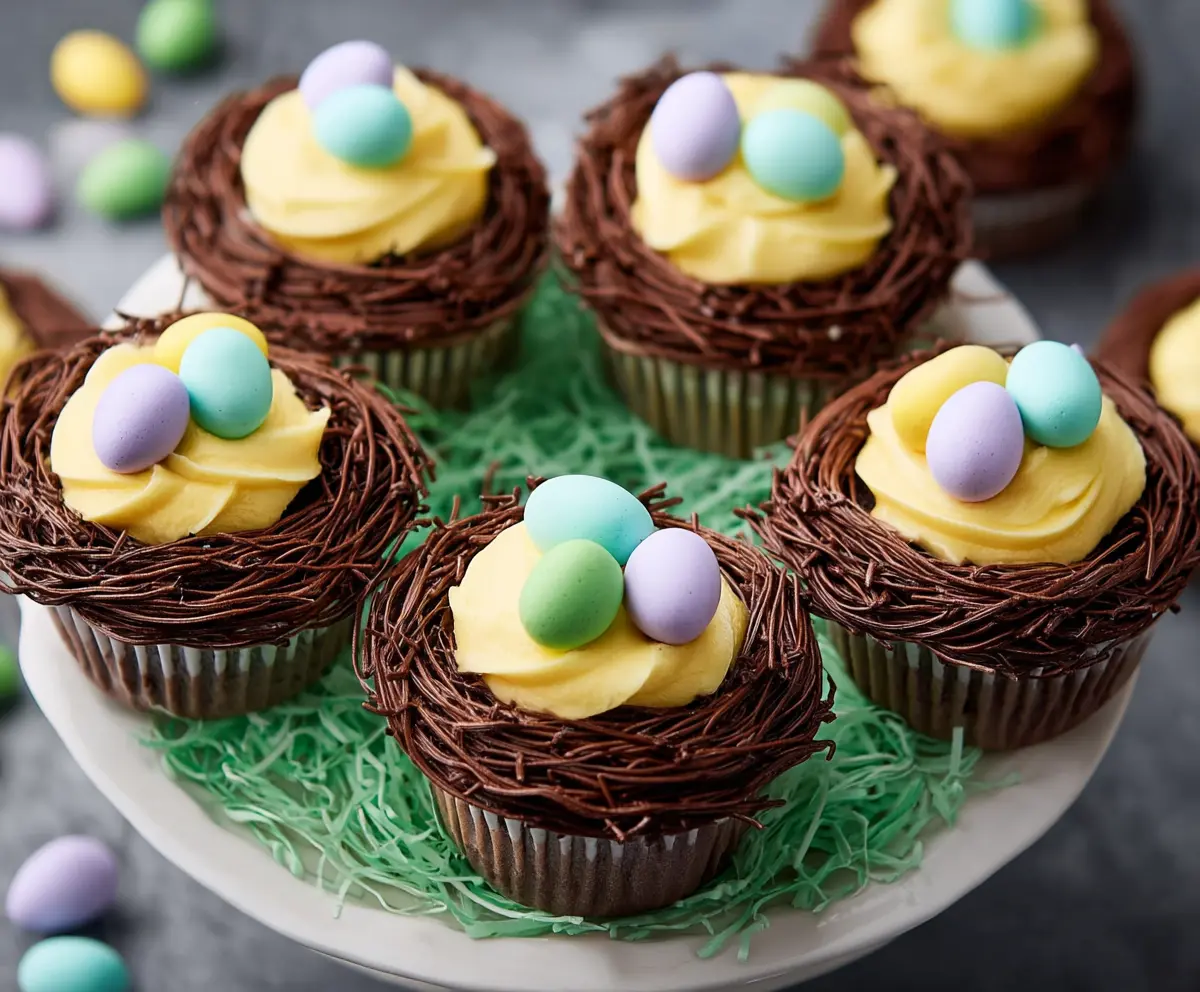
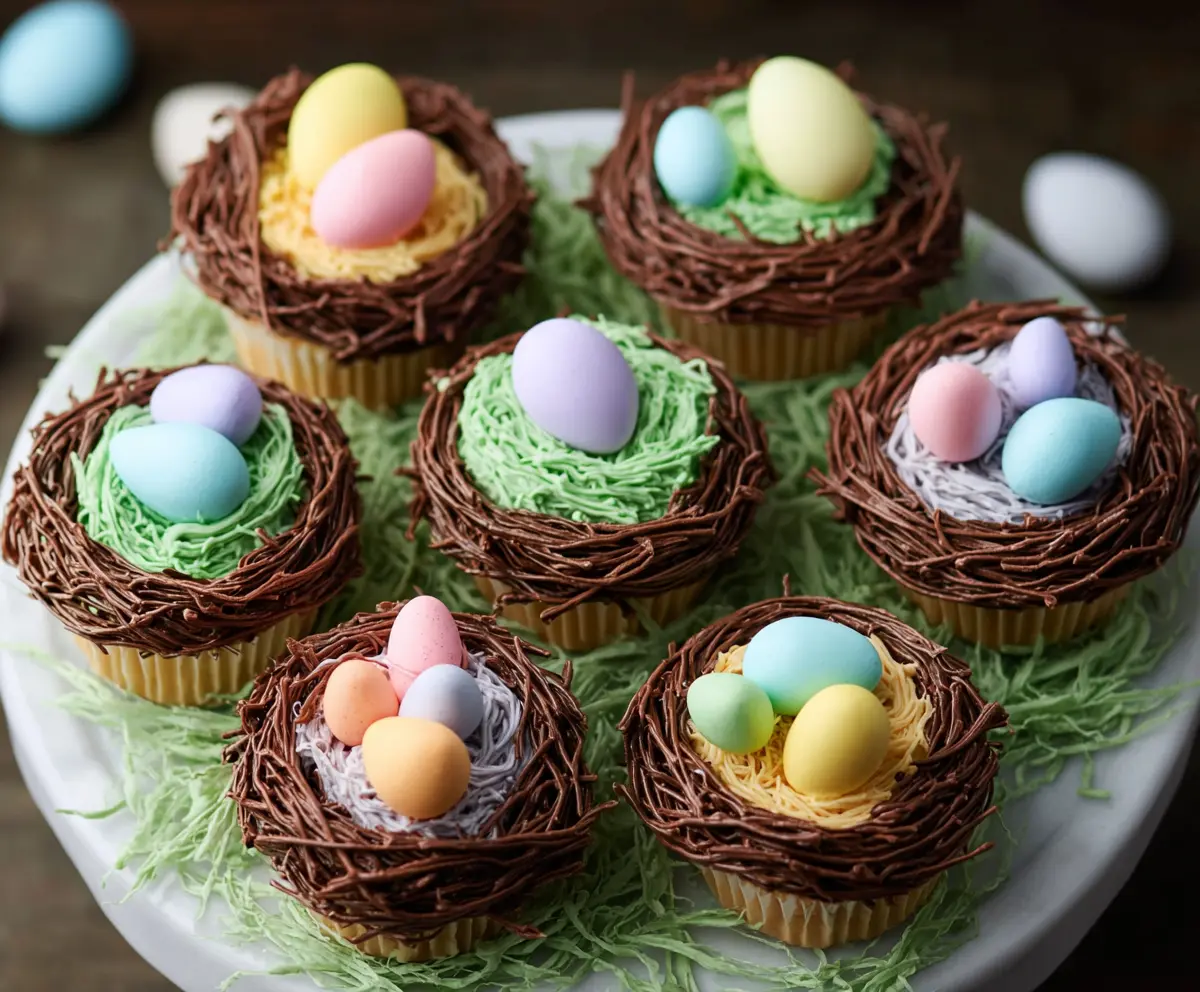
6. Assemble the Nests:
Using a small round piping tip or small star tip, pipe the chocolate frosting around the edge of each cupcake, creating a “nest” shape. Make sure to leave the center of each top open for the buttercream.
7. Add the Yellow Center:
Next, use a piping bag to add a generous swirl or dollop of the yellow buttercream directly in the middle of each chocolate nest you created. This will mimic the look of a real nest’s eggs inside!
8. Place Candy Eggs:
To finish off, carefully place 2-3 mini pastel candy eggs or jelly beans on top of the yellow buttercream. This adds that perfect Easter touch and simulates eggs sitting in a nest.
9. Serve and Enjoy:
Your festive Easter Egg Nest Cupcakes are ready! Arrange them on a plate, ideally with some green edible grass or paper Easter grass for an extra festive look. Sit back, enjoy, and share with friends and family!
These cupcakes are not only delightful to look at, but they also taste amazing—a perfect treat for your Easter celebration!
Can I Use Gluten-Free Flour for the Cupcakes?
Absolutely! You can substitute all-purpose flour with a gluten-free all-purpose blend. Just make sure it contains a binding agent like xanthan gum, or add some if your blend doesn’t include it.
How Do I Store Leftover Cupcakes?
Store any leftover cupcakes in an airtight container at room temperature for up to 3 days. If you want to keep them longer, you can refrigerate them for about a week, but note that this may change their texture slightly.
Can I Make the Cupcakes Ahead of Time?
Yes! You can bake the cupcakes a day in advance. Just keep them covered at room temperature. Frost them on the day you plan to serve for the best texture and presentation.
What Can I Substitute for Buttermilk?
If you don’t have buttermilk on hand, simply mix 1 cup of regular milk with 1 tablespoon of vinegar or lemon juice. Let it sit for about 5 minutes, and you’ll have a perfect buttermilk substitute!