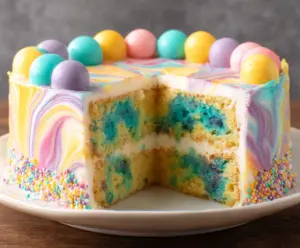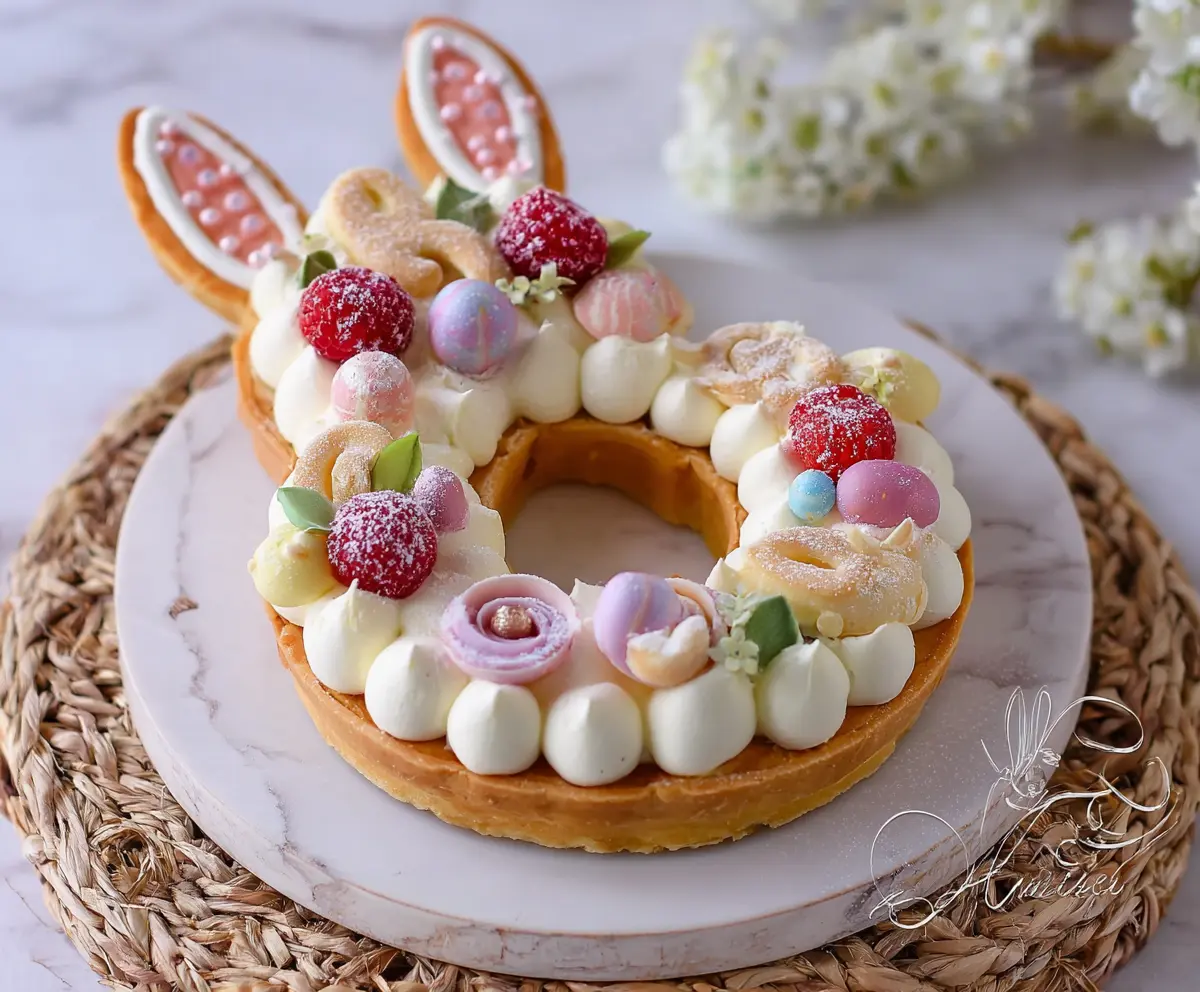
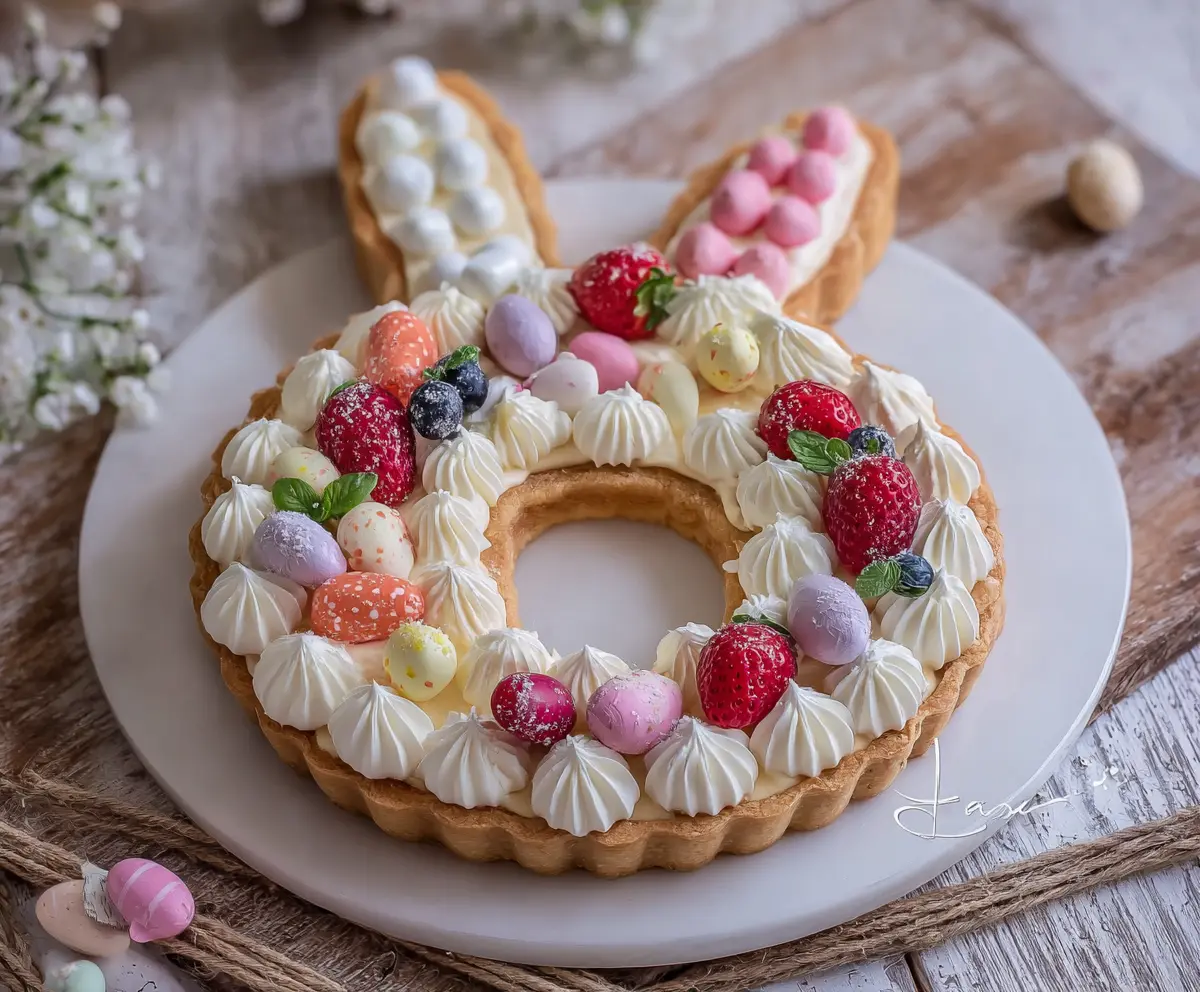
This Easter Bunny Cream Tart is a fun treat that will bring smiles to the table! With a creamy filling and a buttery crust, it’s the perfect dessert to celebrate springtime.
The cute bunny shape makes it playful, and who doesn’t love a treat that looks this adorable? I always make sure to add extra chocolate on top—because why not? 🐰
It’s easy to whip up, and it impresses everyone! Just pop it in the fridge for a bit, and you’re ready to serve a delightful dessert that’s sure to wow!
Key Ingredients & Substitutions
All-Purpose Flour: It’s the main structure for the crust. For a gluten-free option, you can use a gluten-free 1:1 baking blend. I find that using a blend with a bit of almond flour gives a delightful texture!
Unsalted Butter: Cold butter makes for a flakier crust. If you’re dairy-free, try using a plant-based butter. It works surprisingly well in this recipe.
Heavy Whipping Cream: This gives the filling its rich texture. If you’re looking for a lighter version, you could substitute half of it with Greek yogurt, but the flavor will be different.
Cream Cheese: It’s optional but helps stabilize the whipped cream. If you want a lighter tart, you can leave it out or use mascarpone instead for a different flavor profile.
Fresh Raspberries: They add a sweet-tart contrast. Feel free to swap in any seasonal berries you like, such as strawberries or blueberries.
How Do I Get a Flaky Tart Crust?
The crust is the foundation of your tart, so pay close attention to how you prepare it. Working with cold ingredients is key for flakiness. Here’s how to do it well:
- Start with cold butter. Dice it into small cubes and keep it chilled.
- Pulse flour, sugar, and salt first; then add the butter all at once and mix just until it resembles fine crumbs.
- Add the egg yolk and cold water gradually. Don’t overmix! You want just enough moisture for it to hold together.
- Chill the dough twice—once before rolling and once after cutting. This keeps everything firm and helps prevent shrinking while baking.
By following these tips, you’ll end up with a beautifully flaky and delicious tart crust every time!
How to Make an Easter Bunny Cream Tart
Ingredients You’ll Need:
For the Tart Crust:
- 1 1/4 cups (160g) all-purpose flour
- 1/4 cup (50g) granulated sugar
- 1/4 teaspoon salt
- 1/2 cup (115g) unsalted butter, cold and cubed
- 1 large egg yolk
- 2-3 tablespoons cold water
For the Cream Filling:
- 1 cup (240ml) heavy whipping cream
- 1/4 cup (50g) granulated sugar
- 1 teaspoon vanilla extract
- 8 oz (225g) cream cheese, softened (optional for stability)
For Decoration:
- Fresh raspberries
- Colored small meringue kisses or pastel-colored chocolate eggs
- Small sugar cookies shaped as bunny ears and other Easter-themed shapes
- Edible flowers or sugar flower decorations
- Mint or small fresh green leaves
- Powdered sugar for dusting
How Much Time Will You Need?
This delightful Easter Bunny Cream Tart takes about 1 hour to prepare, plus another 20 minutes to bake, and at least 1 hour to chill before serving, making the total time approximately 2 hours and 20 minutes. But don’t worry, most of that time is just waiting while things chill or bake!
Step-by-Step Instructions:
1. Prepare the Tart Crust:
In a food processor, combine the all-purpose flour, granulated sugar, and salt by pulsing until everything is mixed well. Next, add the cold cubed butter and pulse until the mixture resembles coarse crumbs. Add the egg yolk and pulse once more. Gradually add cold water, one tablespoon at a time, until the dough starts clumping together. When it’s ready, turn the dough out onto a floured surface and form it into a flat disc. Wrap it in plastic wrap and let it chill in the fridge for at least 1 hour.
2. Roll and Shape the Tart Crust:
Once chilled, sprinkle some flour on your work surface and roll out the dough to about 1/4 inch thick. Using a large “A” or bunny-shaped stencil, carefully cut out the shape you want. Transfer that shape onto a parchment-lined baking sheet. For the ears, you can cut out separate long oval shapes. Don’t forget to chill the cut dough again in the fridge for another 30 minutes to help hold its shape!
3. Bake the Tart Shell and Ears:
Preheat your oven to 350°F (175°C). Bake the tart shell and ears in the preheated oven for about 15-20 minutes or until they are golden brown. Once baked, let them cool completely on a wire rack.
4. Prepare the Cream Filling:
In a mixing bowl, whip the heavy whipping cream with the sugar and vanilla extract until soft peaks form. In another bowl, beat the softened cream cheese until it’s nice and smooth (this step is optional for a more stable filling). Gently fold the whipped cream into the cream cheese until everything is mixed well. To make decorating easier, transfer the cream filling into a piping bag fitted with a round tip.
5. Assemble the Tart:
Now it’s time to bring it all together! Pipe large dollops of the cream filling over the cooled tart shell, covering it completely. For the finishing touch, attach your bunny ears to the tart base, using a bit of piped cream to hold them in place if needed.
6. Decorate:
Let your creativity shine! Arrange fresh raspberries and colored meringue kisses or pastel chocolate eggs on top of the tart. You can also add small sugar cookies shaped like Easter bunnies or flowers. Tuck edible flowers and fresh mint or small leaves around the cream dollops for a beautiful presentation. Finally, give it a light dusting of powdered sugar for that extra festive look!
7. Serve:
To finish up, chill the tart in the fridge for at least 30 minutes before serving to allow the cream to set. When you’re ready, slice it carefully and enjoy this beautiful Easter Bunny Cream Tart!
This tart is perfect for Easter celebrations, featuring a delicate buttery crust, a light and creamy filling, and colorful, fun decorations that everyone will love!
Can I Use a Store-Bought Tart Crust?
Absolutely! If you’re short on time, a store-bought tart crust can save you some effort. Just follow the package instructions for baking, then proceed with the filling and decoration as outlined in the recipe.
What Can I Substitute for Heavy Cream?
If you’re looking for a lighter option, you can use half-and-half for a less rich filling. Alternatively, coconut cream can be a great dairy-free substitute, but it will impart a slight coconut flavor.
How Do I Store Leftovers?
Store any leftover tart in an airtight container in the refrigerator for up to 2 days. The cream may soften slightly, but it will still be delicious! If you need to, re-chill for a bit before serving.
Can I Make This Tart in Advance?
Yes, you can prepare the tart crust and filling a day ahead. Just store the crust at room temperature wrapped in plastic, and refrigerate the filling until you’re ready to assemble and decorate the tart before serving.