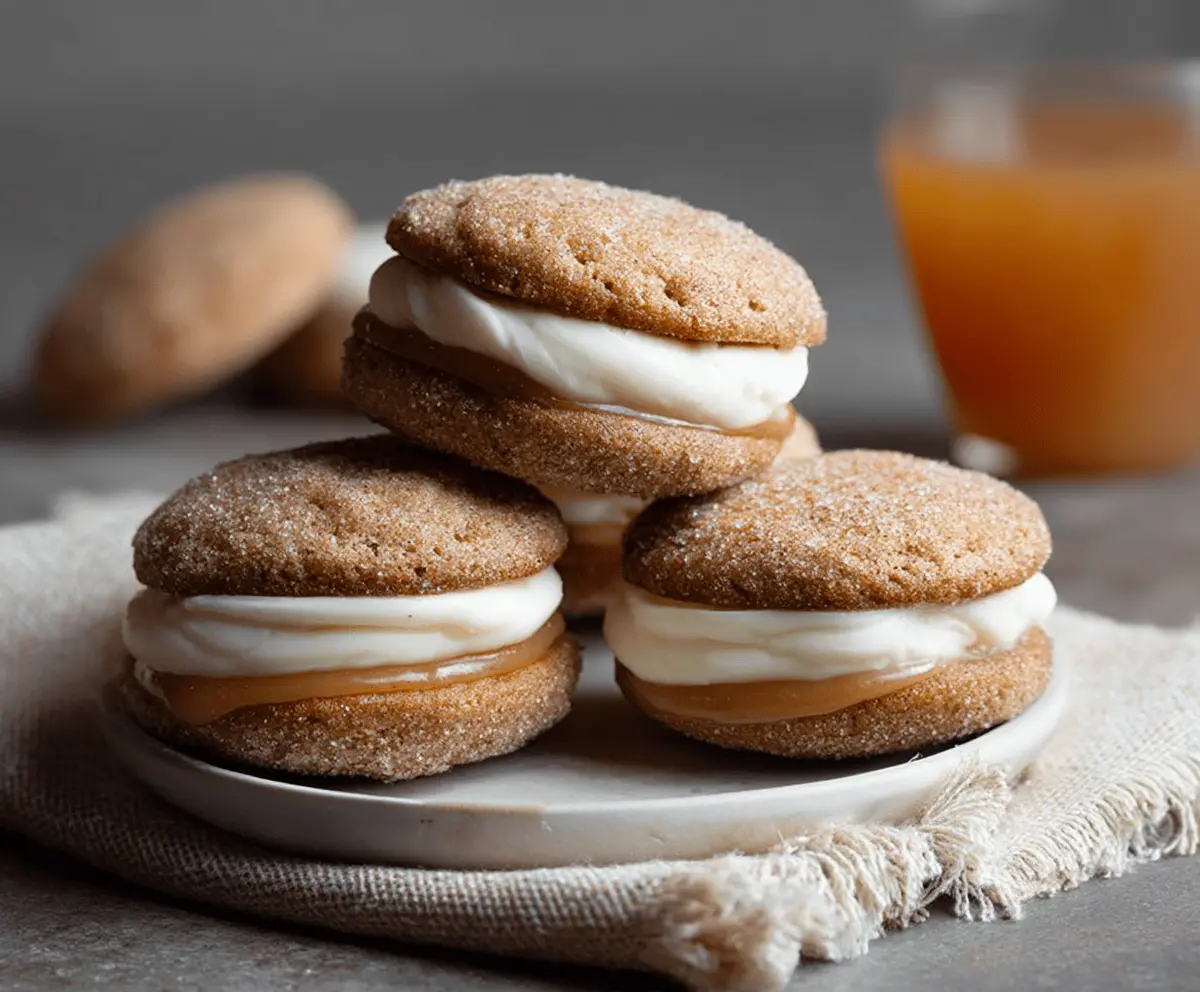
These Apple Cider Whoopie Pies are like a hug in cookie form! Soft, spiced cakes filled with creamy apple butter make them a cozy treat for any day. Perfect for fall parties or just because!
I love how the sweet and tangy apple flavor comes through. It’s like autumn on a plate! They’re so fun to make, and I always end up sneaking a bite (or two). Who could resist? 🍏
Key Ingredients & Substitutions
All-Purpose Flour: This is the base for the cookies and gives them structure. You can use whole wheat flour if you prefer a healthier version, but they might be a bit denser.
Spices (Cinnamon, Ginger, Nutmeg, Cloves): These add warmth and flavor. If you’re missing any, simply adjust with what you have. Pumpkin pie spice can be a great substitute too!
Apple Cider: Fresh apple cider gives the cookies their distinct flavor. If unavailable, you can use apple juice, but it will be sweeter and less tangy.
Cream Cheese: This provides a rich filling. If you’d like a lighter option, try using Greek yogurt instead, though the flavor will differ slightly.
Granulated Sugar: While regular sugar works best, you can try brown sugar for a deeper flavor. Just be aware it may affect texture slightly.
How Do You Cream Butter and Sugar Perfectly?
Creaming butter and sugar together is crucial to achieve light and fluffy cookies. Here’s how to do it:
- Start with softened butter (room temperature) for ease. You should be able to press your finger into it without much effort.
- Use an electric mixer on medium speed. Beat the butter for about 1 minute until smooth.
- Gradually add sugar, mixing for about 3 minutes until the mixture is light in color and fluffy. This incorporates air, making your cookies tender.
Remember not to rush this step; it helps your cookies rise nicely in the oven!
What’s the Best Way to Assemble Whoopie Pies?
Assembling whoopie pies is fun but requires a little care:
- **Pair the cookies by size.** Match up cookies that are similar in diameter for even sandwiches.
- **Spread or pipe the filling** generously onto the flat side of one cookie. A piping bag makes this neater, but a spoon works just fine!
- **Sandwich it with another cookie, flat side down.** Press gently to secure without squishing too much filling out.
This method ensures every bite is filled with delicious cream cheese goodness!
Delicious Apple Cider Whoopie Pies Recipe
Ingredients You’ll Need:
For The Apple Cider Cake Cookies:
- 2 cups all-purpose flour
- 1 1/2 teaspoons ground cinnamon
- 1/2 teaspoon ground ginger
- 1/4 teaspoon ground nutmeg
- 1/4 teaspoon ground cloves
- 1 teaspoon baking soda
- 1/2 teaspoon salt
- 1/2 cup (1 stick) unsalted butter, softened
- 1 cup granulated sugar
- 1 large egg
- 1 cup apple cider
- 1 teaspoon vanilla extract
For The Filling:
- 8 oz cream cheese, softened
- 1/4 cup (1/2 stick) unsalted butter, softened
- 1 cup powdered sugar, sifted
- 1 teaspoon vanilla extract
For Coating:
- 1/4 cup granulated sugar
- 1 teaspoon ground cinnamon
How Much Time Will You Need?
This delicious recipe takes about 25 minutes of prep time and an additional 12-14 minutes for baking. After that, it’s best to let the whoopie pies chill for about 30 minutes before serving. So plan for a total of around 1 hour to make these yummy treats!
Step-by-Step Instructions:
1. Preheat Oven and Prepare Pans:
Start by preheating your oven to 350°F (175°C). While it’s heating up, line two baking sheets with parchment paper or silicone baking mats so your cookies won’t stick.
2. Make the Spiced Dry Mix:
In a medium bowl, whisk together the flour, cinnamon, ginger, nutmeg, cloves, baking soda, and salt. Set this mixture aside; it’s going to add all the lovely flavors!
3. Cream the Butter and Sugar:
In a large bowl, take your softened butter and granulated sugar and beat them together with an electric mixer until light and fluffy. This should take about 3 minutes, so be patient—this step is key to great texture!
4. Add Egg and Vanilla:
Once your butter and sugar mix is looking fluffy, add in the egg and beat until well combined. Then, stir in the vanilla extract for that delightful flavor.
5. Alternate Adding Dry Ingredients and Apple Cider:
Now it’s time to combine! Gradually add the dry flour mixture alternately with the apple cider to the butter mixture. Start and end with the dry ingredients. Mix just until combined—be careful not to overmix!
6. Spoon Batter onto Pans:
Using a cookie scoop or a spoon, drop tablespoon-sized rounds of batter onto the lined baking sheets, making sure to leave about 2 inches between each drop since they will spread while baking.
7. Bake the Cookies:
Place the baking sheets in the preheated oven and bake for about 12-14 minutes, or until the tops are set. You can check doneness with a toothpick—if it comes out clean, they’re ready!
8. Cool and Coat Cookies:
After baking, let the cookies cool on the baking sheets for about 5 minutes. While they are still warm, mix the granulated sugar and cinnamon in a small bowl. Gently sprinkle or brush this cinnamon-sugar mixture over the cookies. Then, transfer them to a wire rack to cool completely.
9. Make the Cream Cheese Filling:
In a separate clean bowl, beat the softened cream cheese and butter together until smooth and creamy. Gradually add the powdered sugar and vanilla extract, mixing until the filling is light and fluffy.
10. Assemble the Whoopie Pies:
Now for the fun part! Pair the cooled cookies by size, then spread or pipe a generous amount of the cream cheese filling onto the flat side of one cookie. Top it off with its matching cookie to form a sandwich.
11. Serve or Chill:
Your Apple Cider Whoopie Pies are almost ready! You can serve them right away or place them in the refrigerator for about 30 minutes if you want the filling to set up a bit more before enjoying.
These delightful whoopie pies capture autumn’s warm spices and the crisp bite of apple flavor. They’re soft, sweet, and perfect for any gathering. Enjoy every delicious bite!
Can I Use Gluten-Free Flour for This Recipe?
Absolutely! You can substitute all-purpose flour with a 1:1 gluten-free flour blend. Just make sure it contains xanthan gum for proper texture, as gluten-free flours may result in a denser cookie otherwise.
How Should I Store Leftover Whoopie Pies?
Store any leftover whoopie pies in an airtight container in the fridge for up to 3 days. They can also be kept at room temperature for about 1 day, but refrigeration will keep the filling fresh longer.
Can I Make the Filling Ahead of Time?
Yes! You can prepare the cream cheese filling up to 2 days in advance. Store it in an airtight container in the fridge, and give it a quick stir before using to ensure it’s smooth and spreadable.
How Can I Make These Whoopie Pies Vegan?
To make vegan whoopie pies, substitute the egg with 1/4 cup of applesauce or a flax egg (1 tablespoon ground flaxseed mixed with 2.5 tablespoons water, let sit for 5 minutes). Use a dairy-free butter and cream cheese alternative as well, and your whoopie pies will still be delicious!