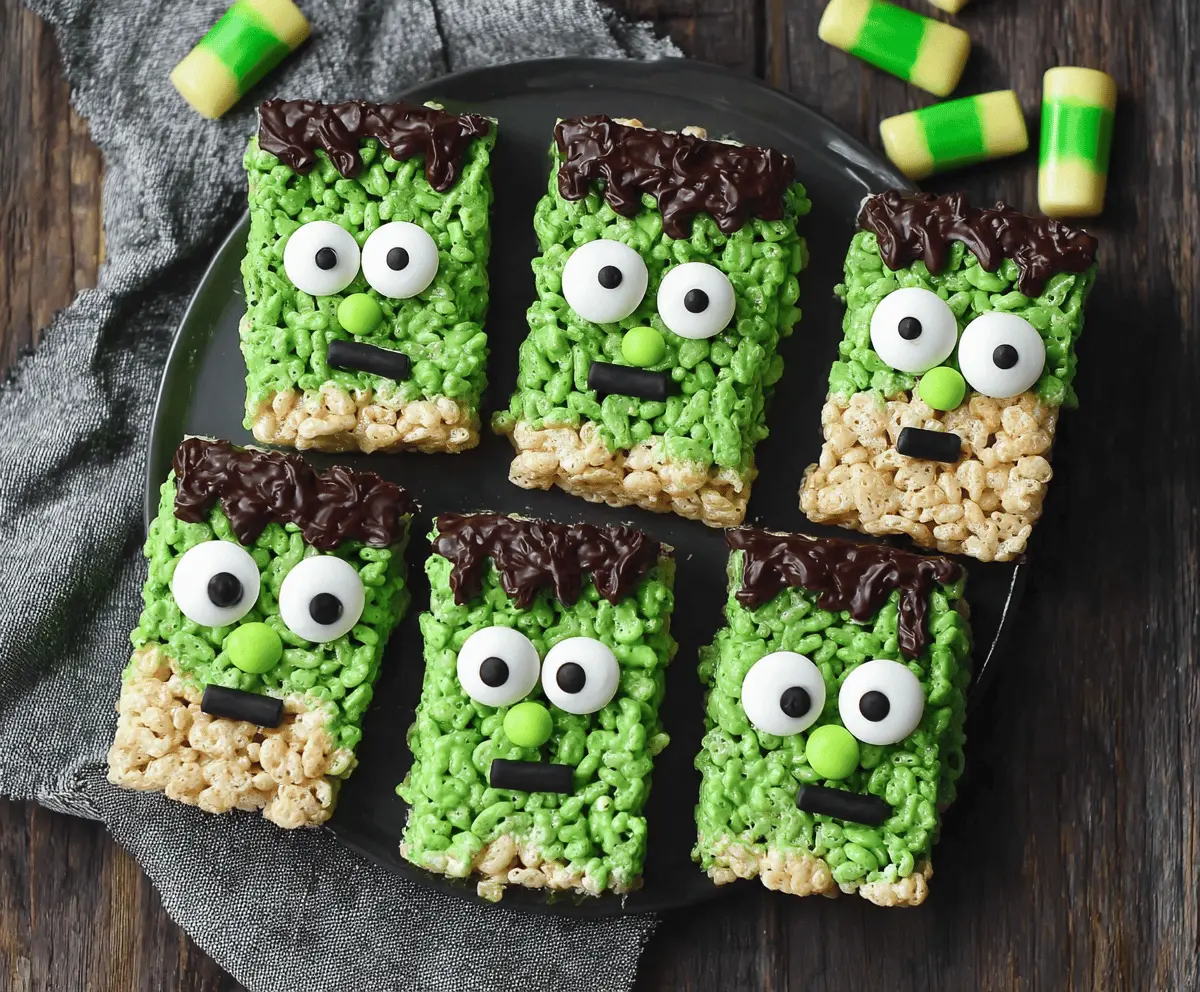
These fun Frankenstein Rice Krispie Treats are a spooky twist on a classic favorite! With gooey marshmallows, crispy rice cereal, and bright green color, they’re sure to be a hit.
They’re super easy to make, and kids love helping out! Just shape them into fun Frankenstein heads and add some chocolate for details. Who knew treats could be so cute and creepy? 🎃
Key Ingredients & Substitutions
Rice Krispies cereal: This is the base of our treats. If you can’t find Rice Krispies, any crispy rice cereal will work just as well! You can even use gluten-free varieties if needed.
Mini marshmallows: These are essential for that gooey texture. If you prefer, you can use large marshmallows—just remember, they’ll take longer to melt! For a vegan option, look for plant-based marshmallows.
Green food coloring: This is what gives the treats their freaky color! Gel food coloring can give a more vibrant hue. If you want a natural option, try using spirulina powder or matcha for a hint of green.
Chocolate chips: Semisweet chips are ideal for the “hair.” You can swap these for milk chocolate or dark chocolate based on your taste preference. For a dairy-free treat, look for vegan chocolate chips.
Candy eyes: These add a fun and spooky look, but if you can’t find them, mini chocolate chips or M&Ms can work as well. Just make sure to have something representing those eyes!
How Do You Melt Marshmallows Without Burning Them?
Melted marshmallows are key to making your treats sticky and delicious, but burning them can ruin the flavor. Here’s how to do it right:
- Use a microwave-safe bowl for even heating.
- Start by melting butter first, then add marshmallows.
- Microwave in short bursts (30 seconds) to avoid overheating.
- Stir well between intervals until the marshmallows are completely smooth. If they start to harden, microwave for a few more seconds.
Following these steps will ensure your marshmallows melt perfectly, leading to yummy treats every time! Don’t rush this step; it’s worth the wait!
Frankenstein Rice Krispie Treats
Ingredients You’ll Need:
- 6 cups Rice Krispies cereal
- 3 tablespoons unsalted butter
- 1 package (10 oz) mini marshmallows
- Green food coloring
- 1 cup semisweet chocolate chips
- 1 tablespoon vegetable oil or shortening (for chocolate)
- Large candy eyes (for decorating, about 12)
- Green candy-coated chocolates or green M&Ms (for noses)
- Small black licorice pieces or black decorating gel (for mouths)
How Much Time Will You Need?
This fun treat takes about 15 minutes for prep and mixing, plus an additional 30 minutes to cool and set. In total, you’re looking at around 45 minutes before you can enjoy these spooky delights!
Step-by-Step Instructions:
1. Prepare the Baking Pan:
Start by greasing a 9×13-inch baking pan with butter or use some non-stick spray to ensure the treats don’t stick. This step is super important for easy removal later!
2. Melt the Butter:
In a large microwave-safe bowl, melt the butter by microwaving it for about 30 seconds. Keep an eye on it to make sure it doesn’t bubble over!
3. Melt the Marshmallows:
Add the mini marshmallows to the melted butter. Microwave the marshmallows in 30-second intervals, stirring between each, until they are completely melted and smooth. This might take a few rounds, so be patient.
4. Add the Color:
Once the marshmallows are melted, stir in the green food coloring a few drops at a time. Mix until you reach a bright green color—just green enough for Frankenstein!
5. Combine with Rice Krispies:
Next, add the Rice Krispies cereal to the green marshmallow mixture. Stir quickly to make sure every piece of cereal is coated evenly with that delicious gooeyness.
6. Form the Treats:
Take about two-thirds of the green-coated cereal mixture and transfer it into the greased pan. Press it down evenly using a buttered spatula or a piece of wax paper. Make sure it’s packed tightly!
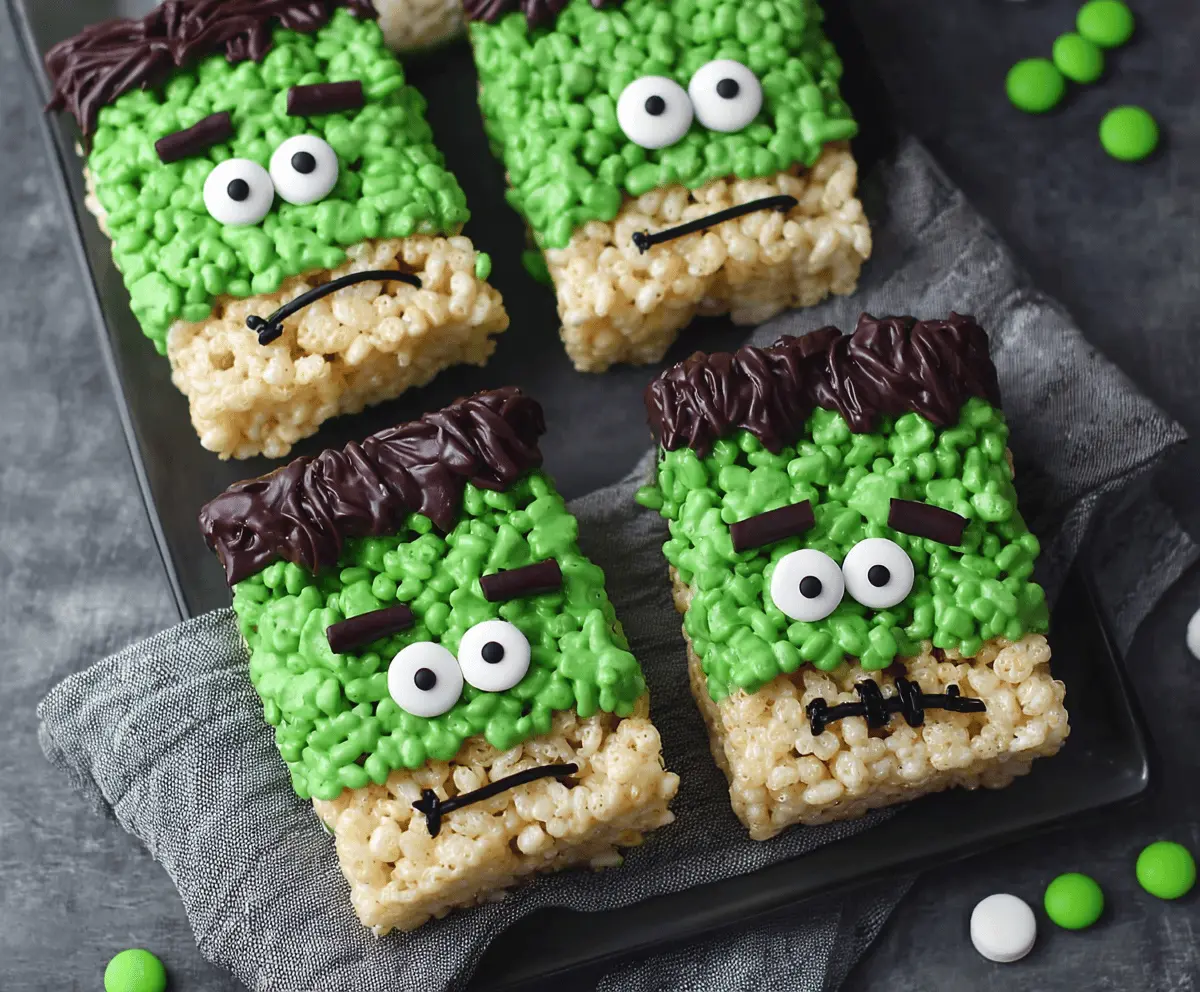
7. Create Frankenstein’s Neck:
Now, take the remaining one-third of the cereal mixture and combine it with 2 cups of plain Rice Krispies cereal. This will form the “neck” of Frankenstein. Press this mix along the bottom edge of the pan to create a two-tone effect!
8. Let It Cool:
Allow the treats to set and cool completely in the pan for about 30 minutes. This allows everything to firm up nicely.
9. Melt the Chocolate:
While waiting, melt the chocolate chips with the vegetable oil or shortening in the microwave. Use 20-second increments, stirring often until smooth and glossy.
10. Cut the Treats:
Once the treats are cool, remove them from the pan and slice them into rectangles about the size of large cookies!
11. Add Frankenstein’s Hair:
With the melted chocolate, dip or spread it along the top edge of each treat to create Frankenstein’s hair. Let those chocolate hairdos set for a bit.
12. Decorate the Treats:
Now it’s time for fun! Press two candy eyes near the top center of each treat, then place a green candy nose just below. Use small pieces of black licorice or decorating gel to create a mouth!
13. Final Set:
Let all your hard work set and cool a bit more before serving. Then, enjoy your spooky and delicious Frankenstein Rice Krispie Treats!
Have fun making these treats and enjoy sharing them with friends and family this spooky season!
Can I Use Different Types of Cereal?
Absolutely! While Rice Krispies are traditional, you can use any crispy rice cereal or even a mix of cereals for a unique texture. Just make sure it’s crisp to hold up in the treats!
Can I Make These Treats Vegan?
Yes! To make vegan Frankenstein Rice Krispie Treats, use plant-based butter and vegan marshmallows. Check the labels to ensure they contain no animal products!
How Should I Store Leftovers?
Store any leftover treats in an airtight container at room temperature for up to 3 days. Avoid refrigerating them, as that can cause them to become hard. They should stay soft and chewy!
Can I Make These Ahead of Time?
Yes! You can make these treats a day ahead. Just be sure to store them properly in an airtight container to keep them fresh.