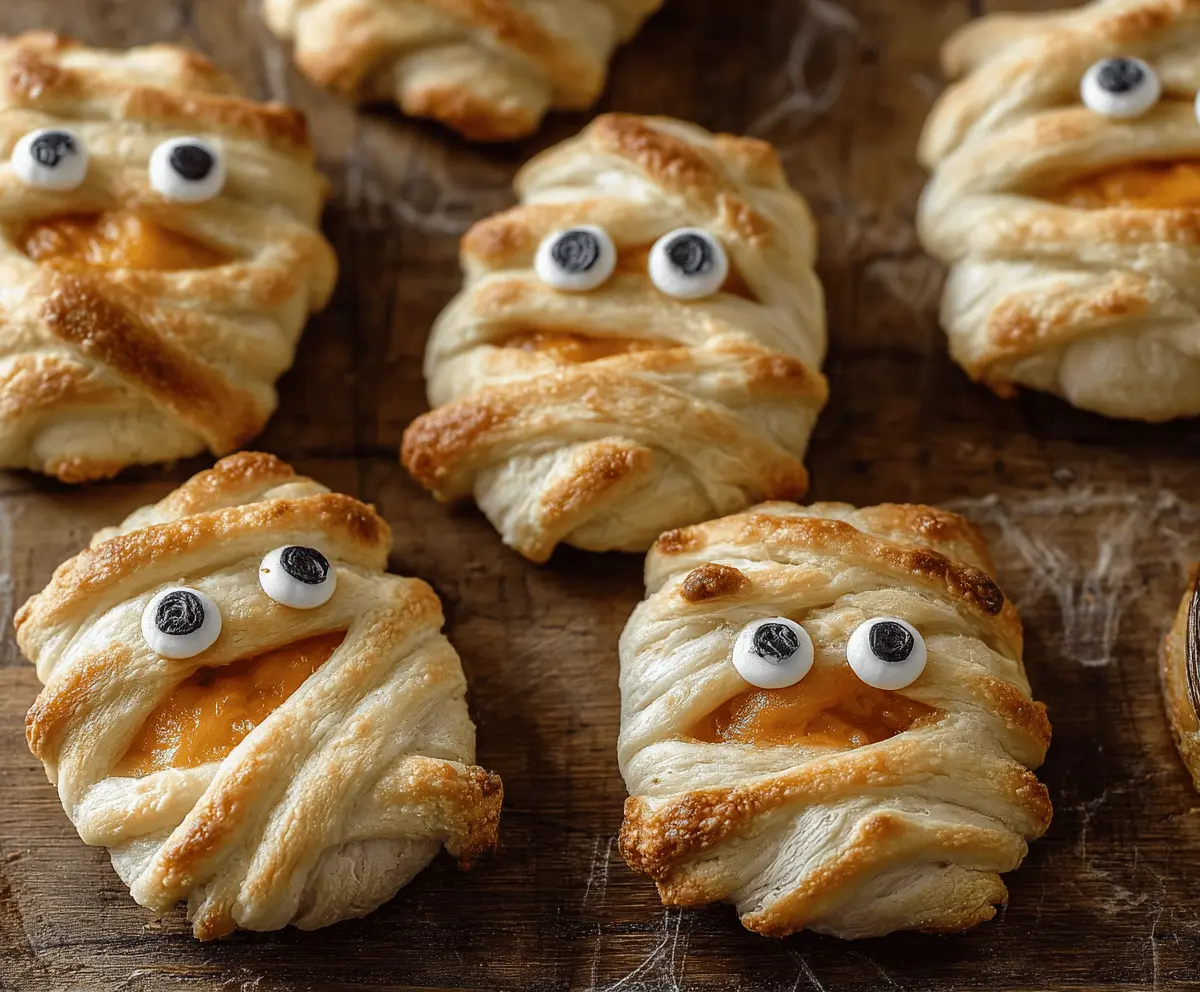
These Baked Cheese Mummies are a fun and tasty twist for any gathering! Wrapped in flaky pastry, the gooey melted cheese oozes out, making each bite completely cheesy and delightful.
Perfect for parties or just a spooky snack, they always steal the show! I love pairing them with a nice warm dip. You won’t be able to have just one—I mean, who can resist? 🎃🧀
Key Ingredients & Substitutions
Crescent roll dough or puff pastry: Both options work well! I usually choose puff pastry for its flakiness. If you don’t have either, you might substitute with homemade dough or even biscuit dough, but that will change the texture slightly.
Cheddar cheese: Cheddar is classic, but feel free to mix it up! Mozzarella, fontina, or pepper jack can also add great flavors. If you’re dairy-free, there are many tasty plant-based cheese options available now.
Egg wash: This gives a beautiful golden finish to the mummies. If avoiding eggs, use a mixture of milk or non-dairy milk and a bit of vinegar to simulate similar results.
Eyes: I love using edible candy eyes for the fun factor! But you can also draw eyes with melted chocolate or create them from cream cheese with a dot of olive or black sesame in the center.
How Do I Wrap the Dough Like Mummy Bandages?
Wrapping the dough so it looks like mummy bandages is key to this recipe. Here’s the trick:
- Cut dough strips about 1/2 inch wide; make sure they’re long enough to wrap around your cheese filling.
- Start at one end of the cheese, laying the strip down and slightly overlapping as you wrap it around. This creates that bandaged effect.
- Leave gaps for the eyes; don’t worry about making it perfect—imperfections make it look more spooky!
It’s great fun for kids and adults alike to get creative with how they wrap their mummies! Just remember, the more the cheese is covered, the gooier it will be when it melts. Enjoy making them!
Baked Cheese Mummies
Ingredients You’ll Need:
- 1 package refrigerated crescent roll dough or puff pastry sheets
- 8 oz cheddar cheese, cut into small cubes or sticks
- 1 egg (for egg wash)
- 1 tsp water (for egg wash)
- Edible candy eyes or small dots of cream cheese and black sesame seeds/black food marker for eyes
How Much Time Will You Need?
This recipe will take you about 15 minutes to prep and 10-12 minutes to bake. So in total, you’ll need around 30 minutes to have these delicious mummies ready to serve!
Step-by-Step Instructions:
1. Preheat the Oven:
Start by preheating your oven to 375°F (190°C). While it warms up, grab a baking sheet and line it with parchment paper to make cleanup easier later on.
2. Prepare the Dough:
Unroll your crescent roll dough or puff pastry on a clean surface. Using a sharp knife or pizza cutter, cut the dough into strips that are about 1/2 inch wide. This is what will wrap around your cheese!
3. Add the Cheese:
Take a small round or oval piece of dough and place a cube or stick of cheddar cheese right in the center. You can use your hands to shape the dough or use a cookie cutter for more uniform pieces—whatever works best for you!
4. Wrap Them Up:
Now, it’s time to make your mummies! Start wrapping the dough strips around the cheese, leaving a small space for the eyes. It doesn’t have to be perfect; the more rustic, the better for that spooky mummy effect!
5. Place on Baking Sheet:
After wrapping, carefully transfer each mummy onto the prepared baking sheet. Make sure to leave some space between them so they don’t stick together while baking.
6. Apply Egg Wash:
In a small bowl, beat the egg with 1 tsp of water to create an egg wash. Using a pastry brush, lightly brush the egg wash over the dough to give it a nice golden color when baked.
7. Bake!
Pop your baking sheet in the preheated oven and let the mummies bake for about 10-12 minutes. Watch closely until they puff up and turn a beautiful golden brown, and the cheese is perfectly melted.
8. Let Cool:
Once baked, remove the mummies from the oven and allow them to cool for a few minutes. This helps to prevent burns and makes them easier to handle.
9. Add Some Eyes:
While the mummies are still warm, add the candy eyes to each one. If you’re using cream cheese dots and black sesame seeds, place those right in the ‘face’ area to bring them to life. Get creative with your mummy eyes!
10. Serve and Enjoy:
These delicious mummies are best served warm while the cheese is ooey-gooey! They’re perfect as snacks for Halloween parties or any festive gathering. Enjoy the cheesy goodness!
Happy baking! 🎃

Can I Use Any Cheese for This Recipe?
Absolutely! While cheddar is a classic choice, feel free to experiment with mozzarella, pepper jack, or even a blend of cheeses for added flavor. Just make sure the cheese melts well!
Can I Prep These Mummies Ahead of Time?
Yes! You can assemble the mummies ahead of time and keep them wrapped in plastic wrap in the fridge. Just be sure to bake them within 24 hours for the best texture and taste.
How Should I Store Leftover Mummies?
If you have leftovers, store them in an airtight container in the fridge for up to 3 days. To reheat, pop them in the oven at 350°F (175°C) for about 5-7 minutes to regain that crispy texture.
What If I Don’t Have Edible Eyes?
No worries! You can create eyes using small dots of cream cheese with a piece of a black olive or a sprinkle of black sesame seeds. Get creative and have fun with it!