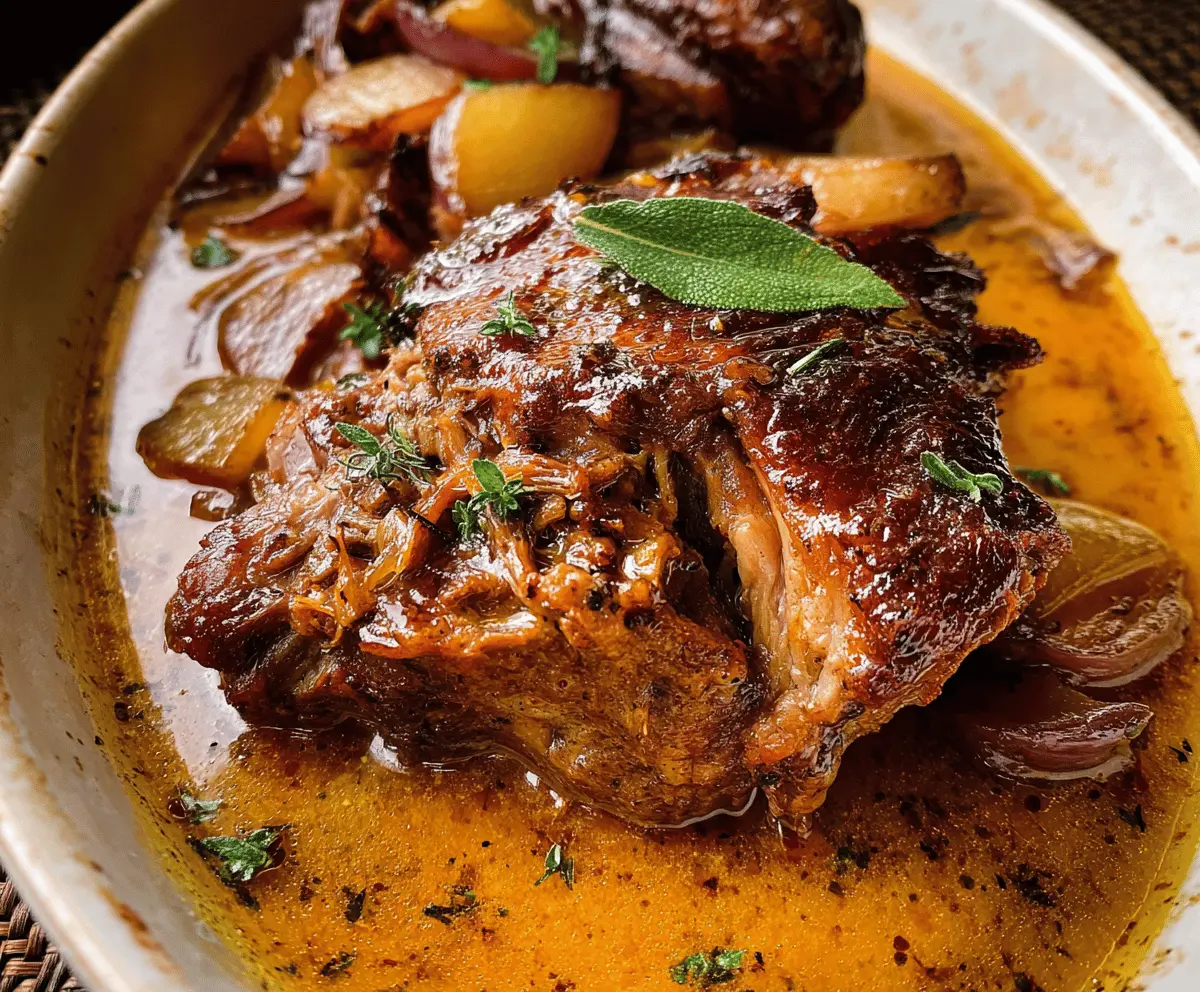
This apple cider braised pork shoulder is wonderfully tender and full of flavor! The warm and sweet notes of apple cider blend perfectly with the juicy pork, making every bite a treat.
When I make this dish, my house smells amazing! I love serving it with mashed potatoes, so I can soak up all that delicious cider gravy. Trust me, your taste buds will thank you! 🍏🌟
Key Ingredients & Substitutions
Pork Shoulder: This is the star of the show! A well-marbled pork shoulder is ideal for braising. If you can’t find it, a pork butt works too. Both cuts become tender with slow cooking.
Apple Cider: Fresh apple cider adds sweetness and depth. You can substitute it with apple juice, though it may be a bit sweeter. Avoid hard cider for this recipe!
Fresh Herbs: Thyme and rosemary provide great flavor. If you don’t have fresh herbs, dried will work fine; just use about a third of the amount since dried herbs are more potent.
Onion & Garlic: These add to the savory depth. If you’re avoiding onions, shallots or leeks could be used as a substitute. Garlic powder can replace fresh garlic in a pinch.
Apples: Granny Smith apples provide a nice tartness, perfect for balancing the dish. Feel free to use any tart apple, like Honeycrisp or Fuji, if Granny Smith isn’t available.
How Do I Get Perfectly Tender Braised Pork?
Achieving tender, juicy pork comes down to slow cooking properly. Here’s how to make it easy:
- Searing the pork: Browning it is key to developing deep flavors, so don’t rush this! Aim for a nice crust that seals in juices.
- Low and slow is the way to go: Cooking at low temperatures (300°F) for several hours allows the connective tissue in the pork to break down, making it tender and delicious.
- Let it rest: After cooking, let the pork rest for at least 10 minutes before slicing. This helps retain its juices and improves flavor.
- Thicken the sauce: If you want a thicker sauce, simply simmer the cooking liquid on the stove for a few minutes. This concentrates the flavors further.
With these tips, you’ll create a wonderful dish that you’ll be proud to serve! Happy cooking!
Tender Apple Cider Braised Pork Shoulder
Ingredients You’ll Need:
- 4 to 5 pounds pork shoulder (bone-in or boneless)
- Salt and freshly ground black pepper, to taste
- 2 tablespoons olive oil
- 1 large onion, sliced
- 3 cloves garlic, minced
- 2 cups apple cider
- 1 cup low-sodium chicken broth
- 2 tablespoons apple cider vinegar
- 2 tablespoons brown sugar
- 2 sprigs fresh thyme (or 1 teaspoon dried thyme)
- 2 sprigs fresh rosemary (or 1 teaspoon dried rosemary)
- 2 bay leaves
- 2 apples, cored and sliced (Granny Smith or your favorite tart apple)
- Optional: 1 cinnamon stick
- Fresh parsley, chopped (for garnish)
How Much Time Will You Need?
This recipe takes about 20 minutes for preparation and then 3 to 4 hours for braising in the oven. Allow additional time for the pork to rest before serving—making it a perfect dish for a cozy weekend meal!
Step-by-Step Instructions:
1. Preheat Your Oven:
Start by preheating your oven to 300°F (150°C). This low temperature will help the pork shoulder get tender and juicy.
2. Prepare the Pork:
Next, pat the pork shoulder dry with paper towels. Generously season it with salt and pepper on all sides to enhance the flavor.
3. Sear the Pork:
In a large oven-safe Dutch oven or a heavy pot, heat olive oil over medium-high heat. Sear the pork shoulder on all sides until it’s deeply browned, usually about 4-5 minutes per side. Once browned, remove the pork from the pot and set it aside.
4. Sauté the Vegetables:
Reduce the heat to medium, then add the sliced onion to the pot. Sauté the onions until softened and starting to brown, which takes about 5 minutes. Add the minced garlic and cook for another minute until it’s fragrant.
5. Add the Liquid Ingredients:
Pour in the apple cider, chicken broth, and apple cider vinegar while scraping the bottom of the pot to deglaze and loosen any browned bits. This adds great flavor to your dish.
6. Season the Liquid:
Stir in the brown sugar, thyme, rosemary, bay leaves, and the optional cinnamon stick. This mix will create a wonderful aromatic sauce for your pork.
7. Return the Pork and Add Apples:
Place the pork shoulder back into the pot, nestling it into the liquid. Add the sliced apples around the pork to infuse their flavor.
8. Bring to a Simmer:
Bring the liquid to a simmer on the stovetop. This will activate the flavors before it goes into the oven.
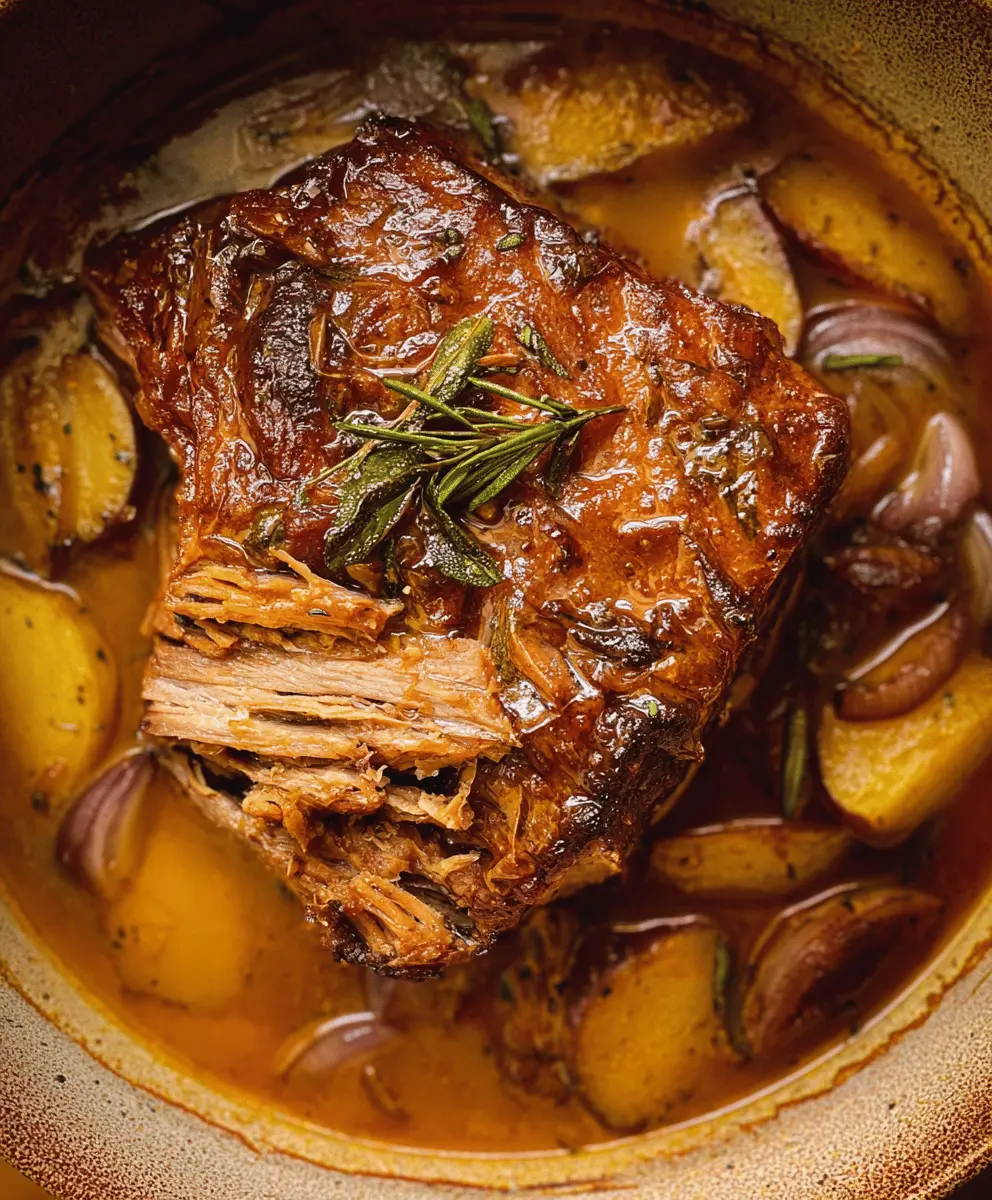
9. Braise the Pork:
Cover the pot with a lid and carefully transfer it to the preheated oven. Braise for about 3 to 4 hours, or until the pork is fork-tender and easily shreds apart.
10. Rest and Serve:
Once done, carefully remove the pork from the pot and let it rest for about 10 minutes. After resting, shred or slice the pork as desired.
11. Final Sauce Touch:
If you want a thicker sauce, strain the cooking liquid into a saucepan and simmer over medium heat until it reduces slightly. This will intensify the flavors.
12. Garnish and Enjoy:
Serve the tender pork shoulder topped with the apple-cider sauce and a sprinkle of fresh parsley. It pairs wonderfully with mashed potatoes, roasted vegetables, or crusty bread. Enjoy your delicious meal!
This dish beautifully combines the sweetness and tartness of apple cider and creates a tender, juicy pork shoulder that’s perfect for cozy dinners with family and friends.
FAQ for Tender Apple Cider Braised Pork Shoulder
Can I Use a Different Cut of Pork?
Absolutely! While pork shoulder is ideal for braising due to its marbled fat content, you can use pork butt or even a whole pork loin in a pinch. Just keep in mind that leaner cuts may require less cooking time to prevent them from drying out.
Is It Possible to Make This Recipe Without Apple Cider?
Yes, you can substitute apple cider with apple juice for a sweeter taste. If you’re looking for a more savory flavor, try using white grape juice or even adding some additional vinegar to balance the sweetness. Just make sure to adjust the sugar accordingly!
How Should I Store Leftovers?
Store any leftovers in an airtight container in the refrigerator for up to 3 days. Make sure to keep the sauce separate if possible. To reheat, gently warm on the stovetop or in the microwave, adding a splash of broth or water if necessary to maintain moisture.
Can I Make This Ahead of Time?
Yes! This dish actually benefits from resting in the fridge overnight as the flavors meld together. Simply reheat it gently before serving. You can also freeze it for up to 3 months; just thaw overnight in the refrigerator before reheating.
Feel free to reach out if you have more questions or need cooking tips! Enjoy your meal!